Lesson 1- Intro to Unit
H/W (due on Monday 27th August)- Brainstorm your emotions-
Make a list of all the emotions you feel- this can be anything from anger and frustration to joy, love and thankfulness- come up with as many as you can!
Your next task is to find images of faces online that demonstrate the emotions you have listed- look for as many as you can. Print these out and stick them into your sketchbook with labels for what the emotions are. Be creative here- this could be done as a well planned collage or simply ordered neatly in your book- presentation does matter!
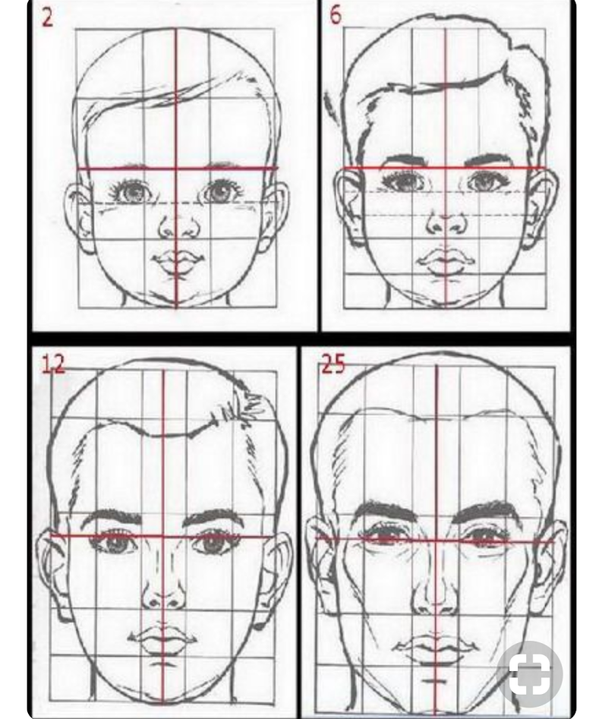
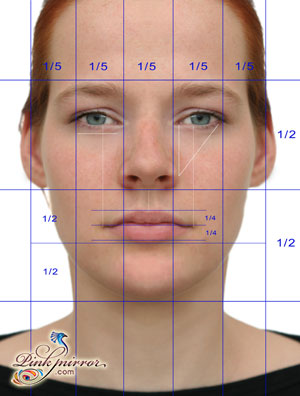
Lesson 2- Proportions of the Human Face


Lesson 3- Art History and Research
Homework Task:-
Practicing Expressions
Take 4-6 selfies that have interesting expressions. Print these out and stick them into your sketchbooks.
Practicing Expressions
Take 4-6 selfies that have interesting expressions. Print these out and stick them into your sketchbooks.
Lesson 4- Developing Skills (Tone & Expression)
Task 1- Begin by creating a tonal ladder in your sketchbook- this should be at least 4 tones long with HB only or aim for at least 6 tones with a maximum of 3 different pencils.
Read through this worksheet to gain a better understanding of light and tone and posing for dramatic lighting.
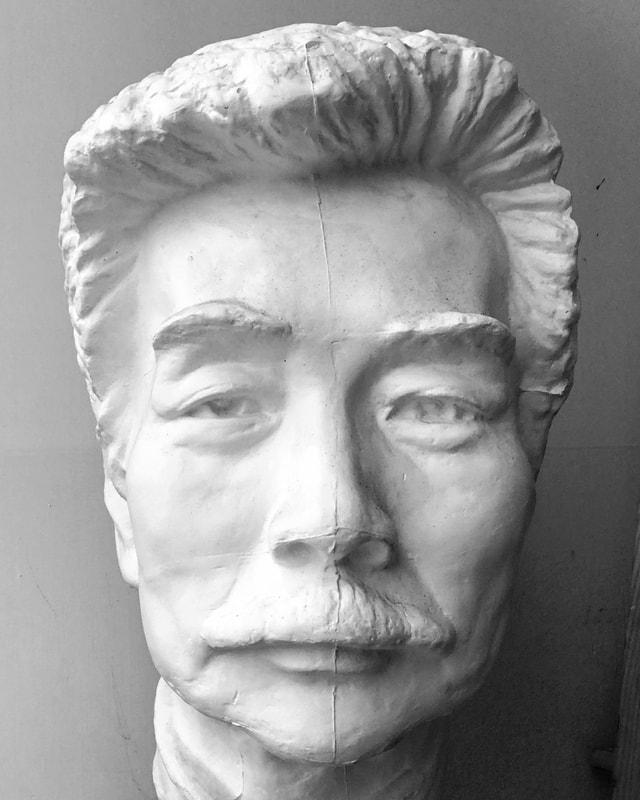
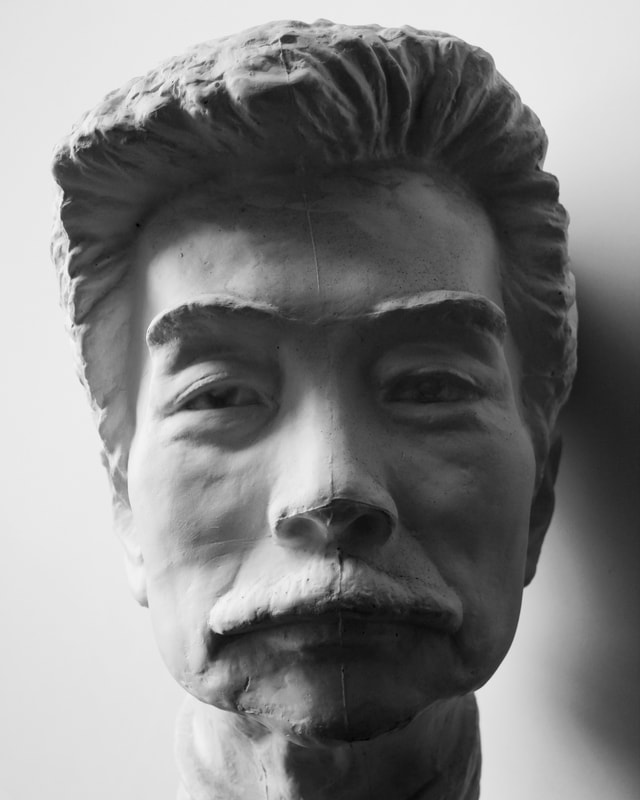
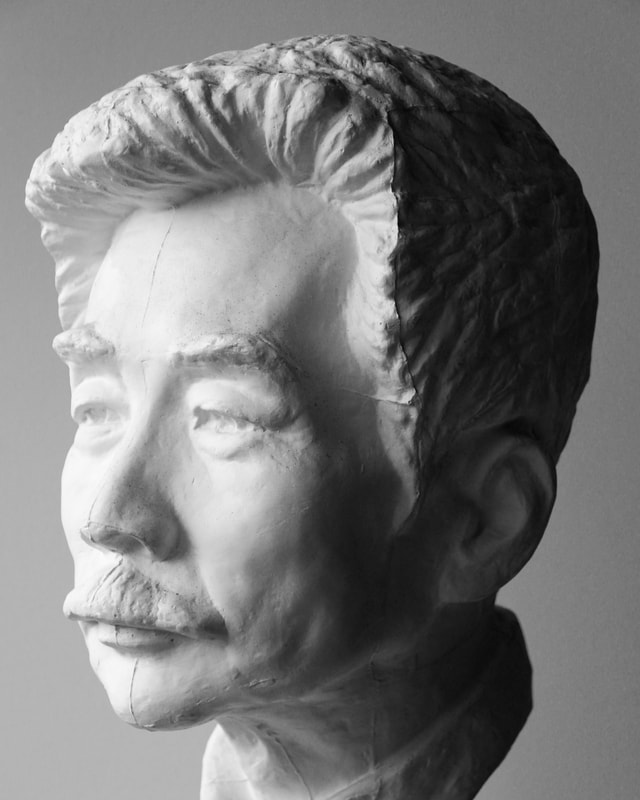
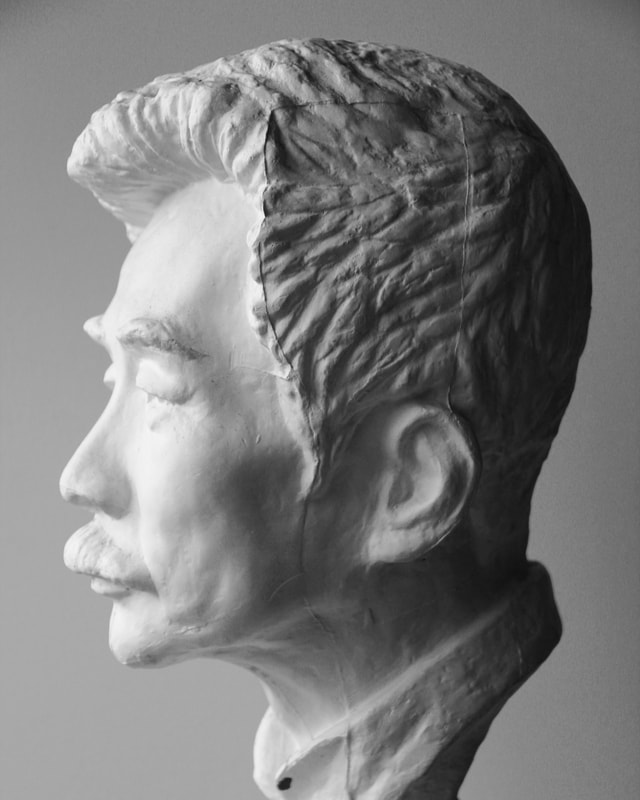
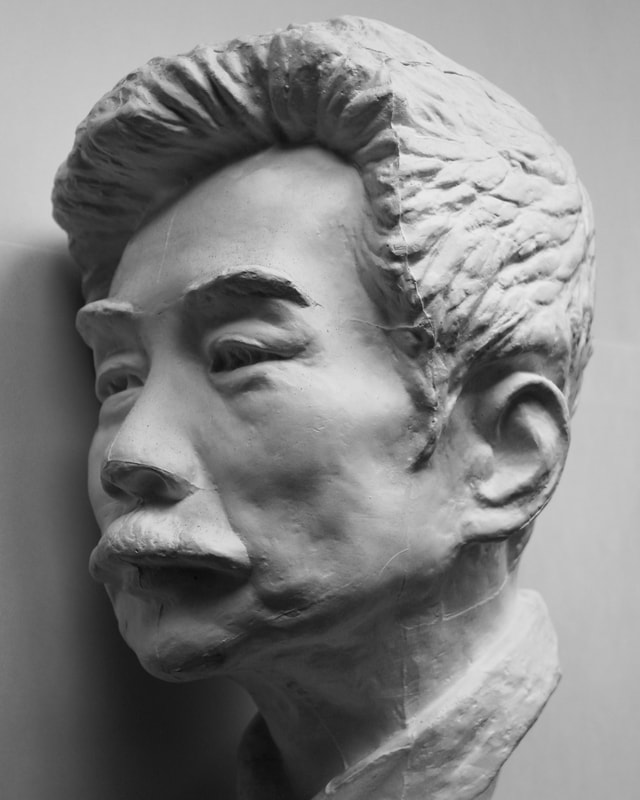
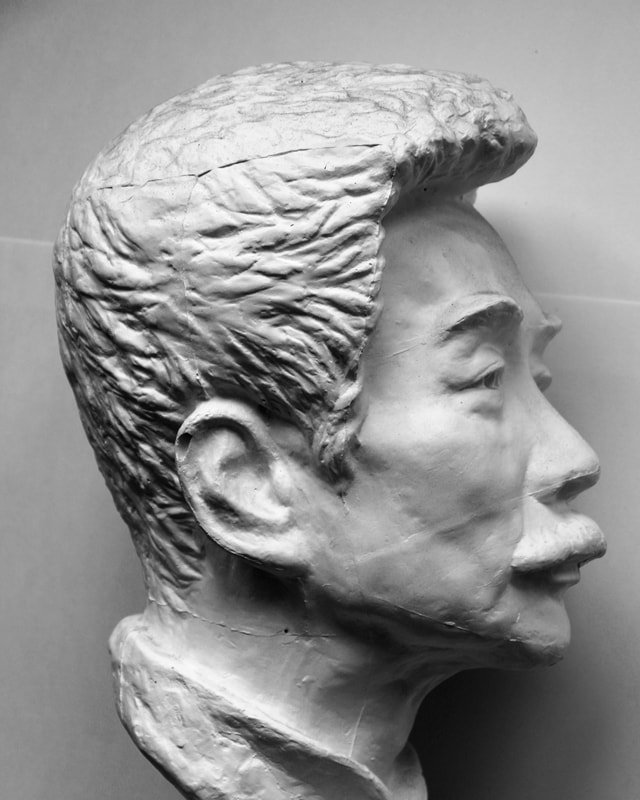
Pick one of the pictures of the plaster casts. You will be drawing this in this lesson using the grid up system. Use this opportunity to get use to looking for light and tone and figuring out how to convey this in your work- this experience should support you greatly when you come to creating your own dramatically lit portrait.
During this session I will be taking each of you aside for a photoshoot as preparatory work for your self portraits.
During this session I will be taking each of you aside for a photoshoot as preparatory work for your self portraits.
Gridding Up- What You Will Need
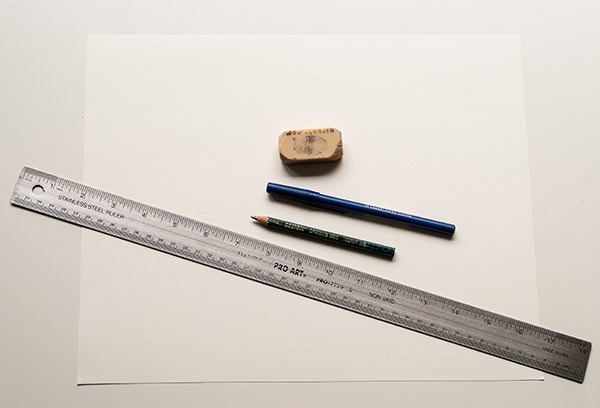
- Paper or canvas
- Ruler
- Pencil
- Pen
- Eraser
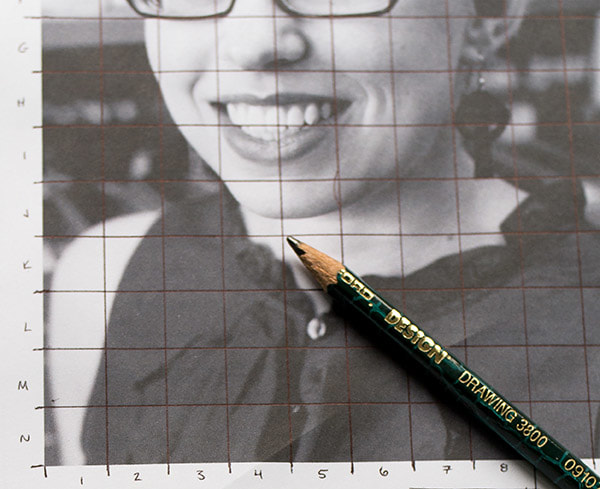
How to Make a Grid Traditionally
Step 1
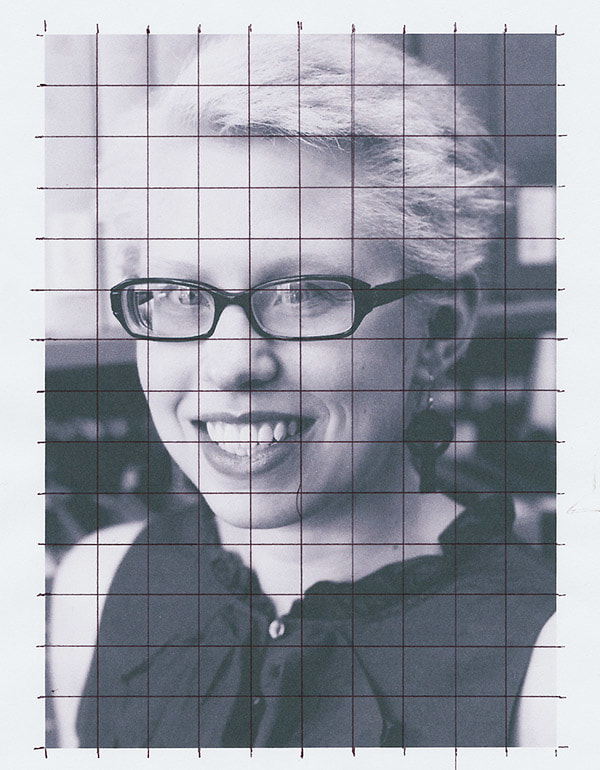
Print out your photograph at a reasonable size. It doesn't have to be gigantic but you need to be able to see the details so you can copy them. I prefer to print it out in black and white so that it's easier to see the edges. My portrait is 5" x 7".
Print out your photograph at a reasonable size. It doesn't have to be gigantic but you need to be able to see the details so you can copy them. I prefer to print it out in black and white so that it's easier to see the edges. My portrait is 5" x 7".

Step 2
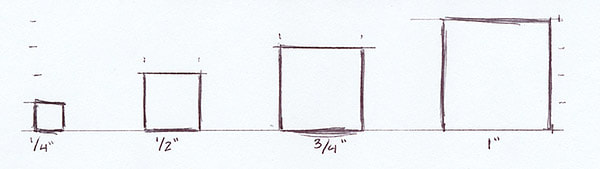
Figure out an appropriate size of the grid spacing. For most images, I prefer 1/2" between each line but sometimes 1/4" or 3/4" works best. Here I'm going to use 1/2".
Figure out an appropriate size of the grid spacing. For most images, I prefer 1/2" between each line but sometimes 1/4" or 3/4" works best. Here I'm going to use 1/2".
Step 3Draw the grid out on your printed photo. I prefer to use pen here so that it's easier to see on top of the photograph.
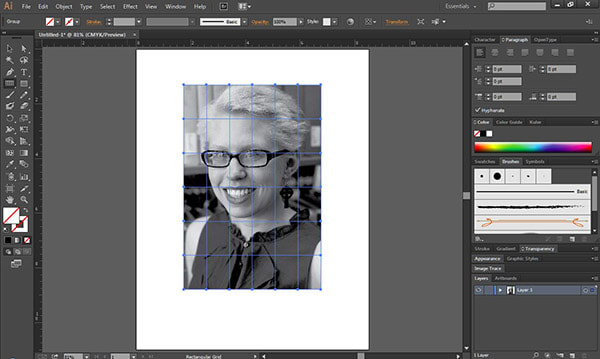
How to Make a Grid Digitally
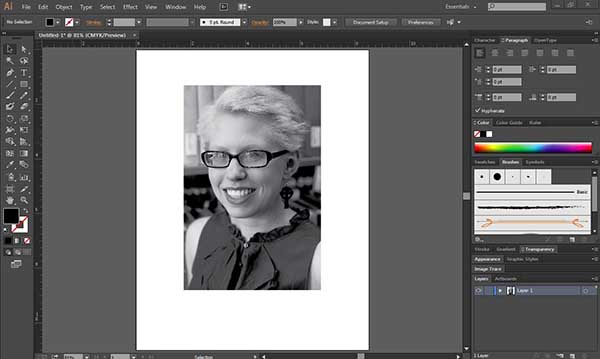
Step 1Place your photo in Adobe Illustrator at a reasonable size. It doesn't have to be gigantic but you need to be able to see the details so you can copy them. I prefer to use a black and white photo so that it's easier to see the edges.
Step 2
Click and hold the Line Segment Tool. Choose the Grid Tool. Here you can see the grid tool as the fourth image down on the left toolbar under the pen tool. Then draw a box over the image.
Click and hold the Line Segment Tool. Choose the Grid Tool. Here you can see the grid tool as the fourth image down on the left toolbar under the pen tool. Then draw a box over the image.
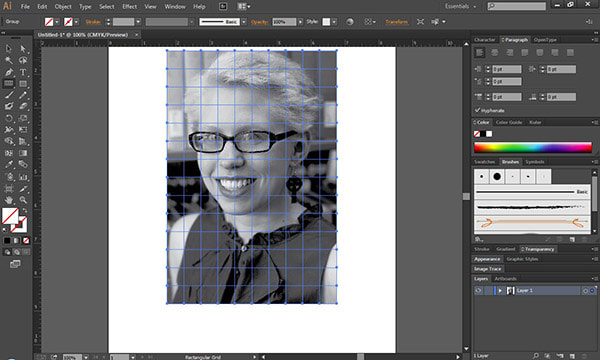
Step 3
Holding down the mouse, use the arrow keys to create as many grid boxes as you want. I used the ruler guides to make 1/2" boxes.
Holding down the mouse, use the arrow keys to create as many grid boxes as you want. I used the ruler guides to make 1/2" boxes.
Step 4
Now you can either print out this image or leave it up on your computer screen.
Now you can either print out this image or leave it up on your computer screen.
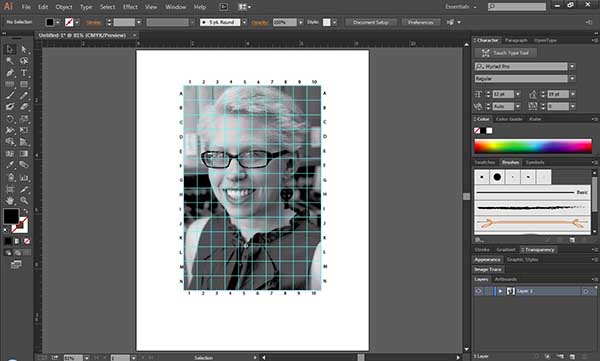
Step 5If you print out the picture, label it according to the same way in the steps above. If you leave it on your screen, use the text tool to label the grid. I prefer to go A, B, C, etc. on the left and right sides and 1, 2, 3 on the top and bottom. Labelling the boxes makes it much easier when you get into the middle of the grid and you start getting lost.
Prepare Your Drawing Paper (or Canvas)
Step 1
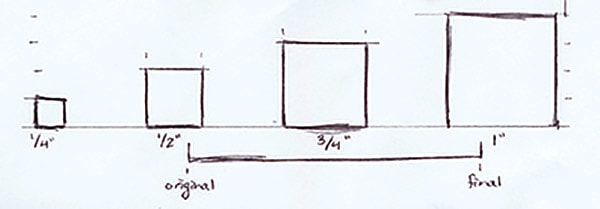
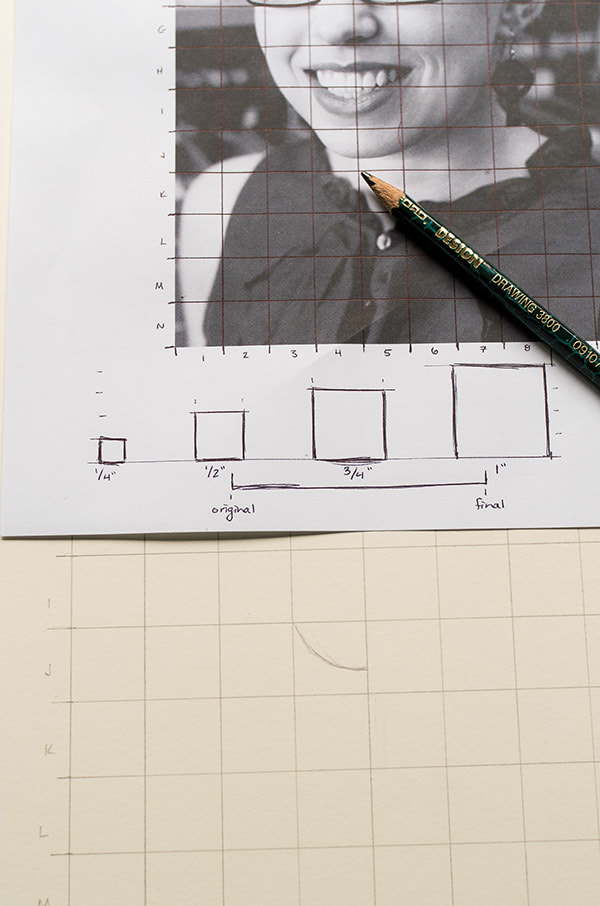
Determine the final size of your drawing. Here you'll have to do some quick calculations. Are you doubling the photograph? Quadrupling? One and a half?
Step 2
Measure and draw out the outer rectangle/square of your final drawing. Here I'm making the final drawing twice as big as my original 5" x 7" photograph so my outer box is 10" x 14".
Step 3
Use your ruler to determine the new size of the grid. If you're doubling the size of the photograph and your grid squares are 1/4" by 1/4", then your new grid squares will be 1/2" by 1/2". Since my original grid was 1/2" boxes, my final grid will be 1" boxes.
Step 4
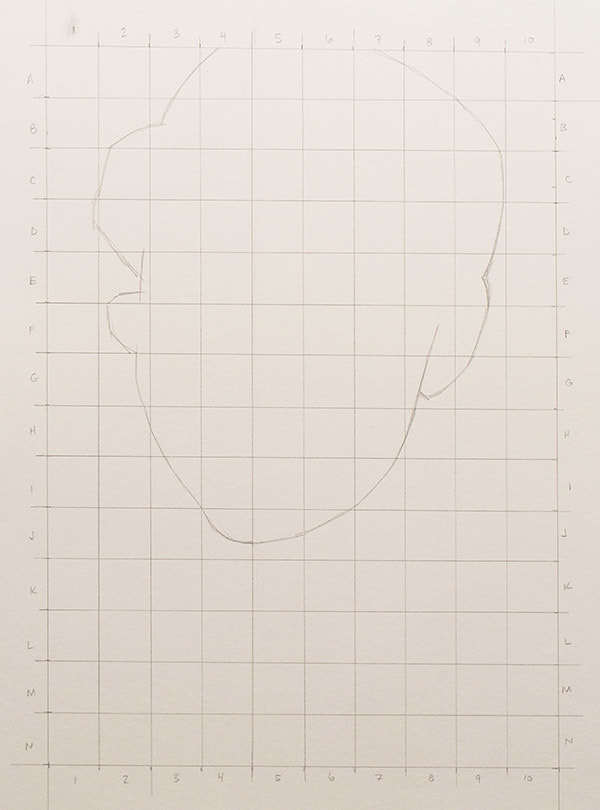
Draw out your final grid on your drawing paper.
Draw out your final grid on your drawing paper.

Step 5
Label your new grid identical to the smaller grid on the photograph.
Label your new grid identical to the smaller grid on the photograph.

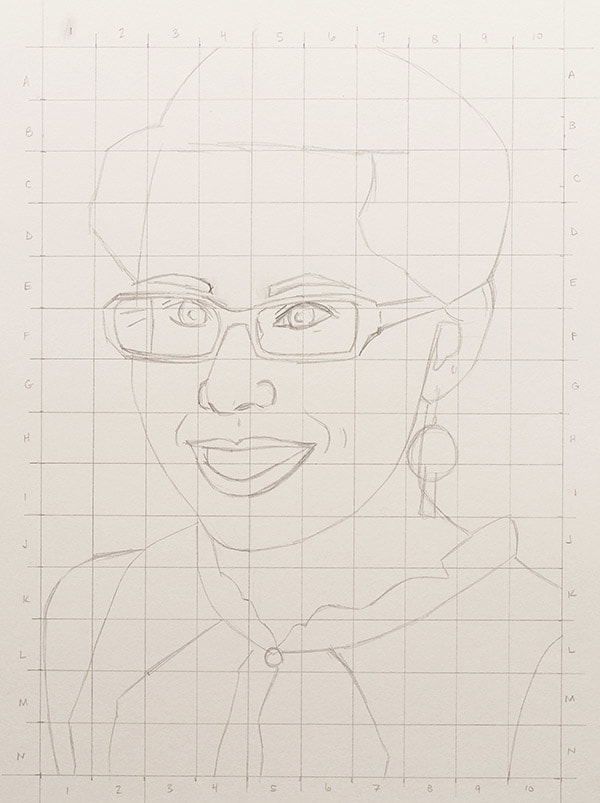
Begin Drawing
Step 1Pick where to start. I like to start at a recognizable point. Perhaps it's the bottom of a chin or the part in someone's hair. Here I'm starting at the bottom left of the chin.
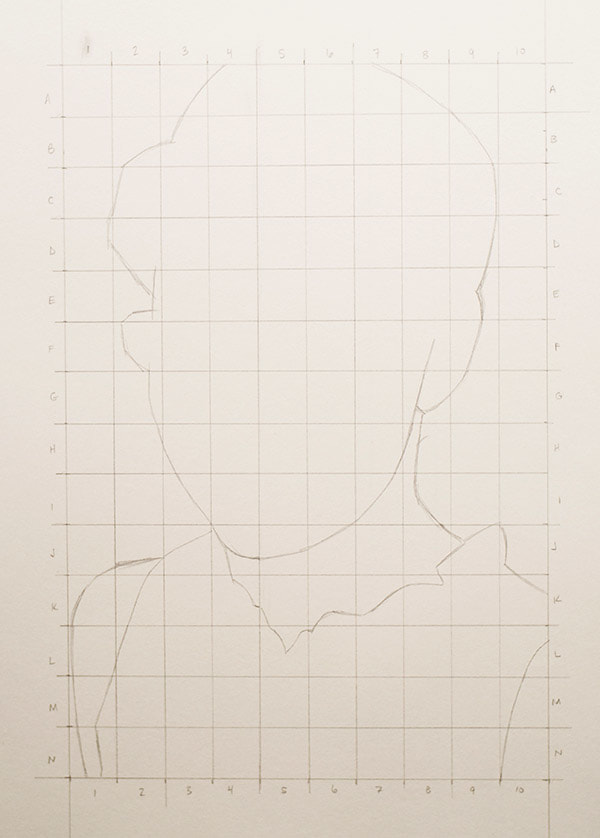
Step 2Look at the box that contains your starting point and find the corresponding box on the bigger paper. For me, that's box J4. Copy the outline line in that box. I drew in the curve of the chin in box J4.
Step 2Look at the box that contains your starting point and find the corresponding box on the bigger paper. For me, that's box J4. Copy the outline line in that box. I drew in the curve of the chin in box J4.
Step 3
Follow the outline from box to box, using the grid labels to help you know where you are. I usually work left to right and slowly make my way around the head first. A good tip is to look at where the outline starts and ends in each box. Is it touching the middle of the outer grid box line or the corner? It becomes a bit more mathematical when you do it this way but you won't get lost and you'll be closer to the actual image.
Follow the outline from box to box, using the grid labels to help you know where you are. I usually work left to right and slowly make my way around the head first. A good tip is to look at where the outline starts and ends in each box. Is it touching the middle of the outer grid box line or the corner? It becomes a bit more mathematical when you do it this way but you won't get lost and you'll be closer to the actual image.
Draw All the Large Shapes
Step 1
Continue drawing until you have all of the big shapes penciled in. If your lines don't meet up in the end, go back to the labels on the boxes and double-check yourself box by box. By big shapes I mean the outlines of the people or landscape or animal that you're drawing.
Continue drawing until you have all of the big shapes penciled in. If your lines don't meet up in the end, go back to the labels on the boxes and double-check yourself box by box. By big shapes I mean the outlines of the people or landscape or animal that you're drawing.
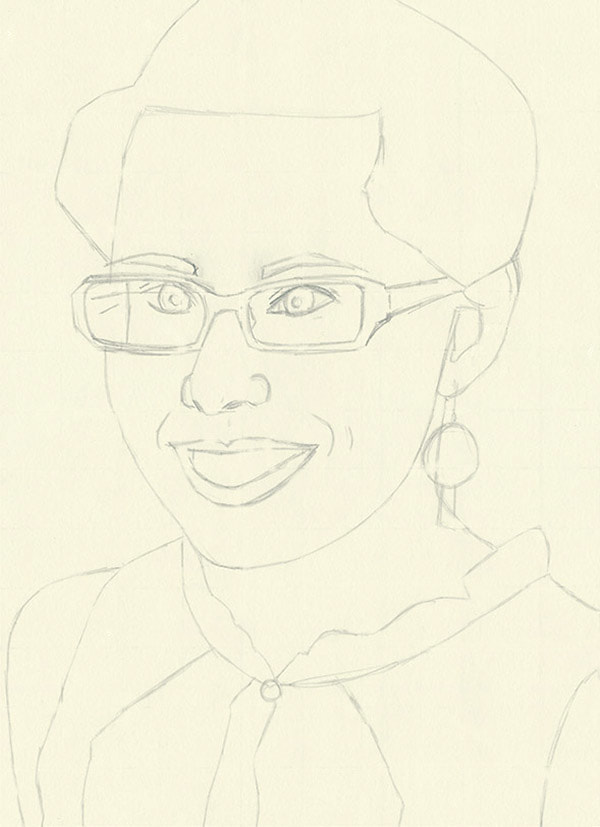
Begin Adding the Details
Step 1
Now that you have all the big shapes drawn in, begin to pencil in the smaller details like hair lines, eyes, ears, etc.
Now that you have all the big shapes drawn in, begin to pencil in the smaller details like hair lines, eyes, ears, etc.
Step 2
Keep looking at the grid labels to check that you're making the details in the right boxes. Generally if you're going to get lost, you'll do it here.
Keep looking at the grid labels to check that you're making the details in the right boxes. Generally if you're going to get lost, you'll do it here.
Check Box By Box
Step 1Now that your drawing is finished, check over the drawing box by box. This is the boring part but you want to catch any mistakes now and not once you start painting or inking.
Erase the Grid
Step 1
Go in with an eraser and begin to erase the grid lines as well as you can. This may take a very small eraser in some parts.
Go in with an eraser and begin to erase the grid lines as well as you can. This may take a very small eraser in some parts.
You're Ready to Now Create Your Masterpiece! Now that you have your plaster cast image at its final size, you can start adding tone to turn it into a finished piece of artwork.
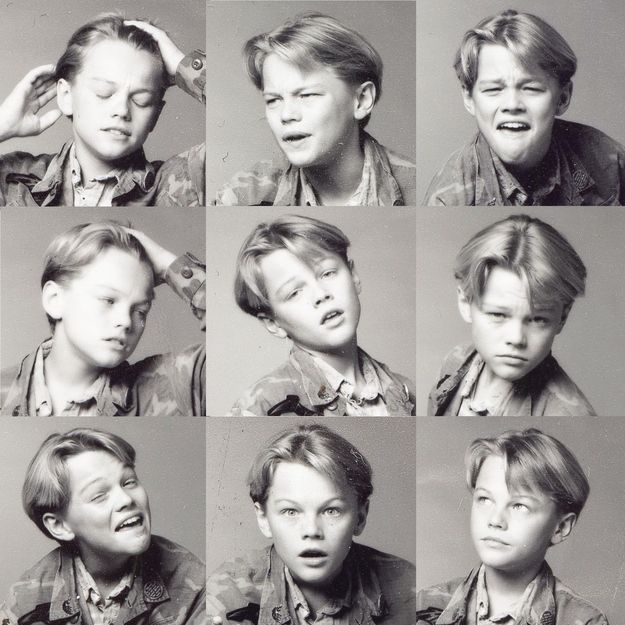
Lesson 5- Preparing for the Final Piece
Here are some examples of the poses we would like you to recreate as the research for your final piece-

The Final Artwork
Once you have tried out a few poses and had a look through the pictures, pick your favourite and print it out. Have another look at the gridding up guide and use the grid to turn the picture of yourself into an A3 drawing. Then determine the light source and start adding tone and light.
