| big_picture_sheet-_my1_the_artistic_study_of_anatomy__and_dragons_.docx |
| crit_a_knowing_and_understanding.docx |
| crit_b_developing_skills.docx |
| crit_c_thinking_creativly.docx |
| crit_d_responding.docx |
Lesson 1- An Introduction into the History of Anatomy in Art and Science
Lets start with a brief outline of Art history and the key movements...
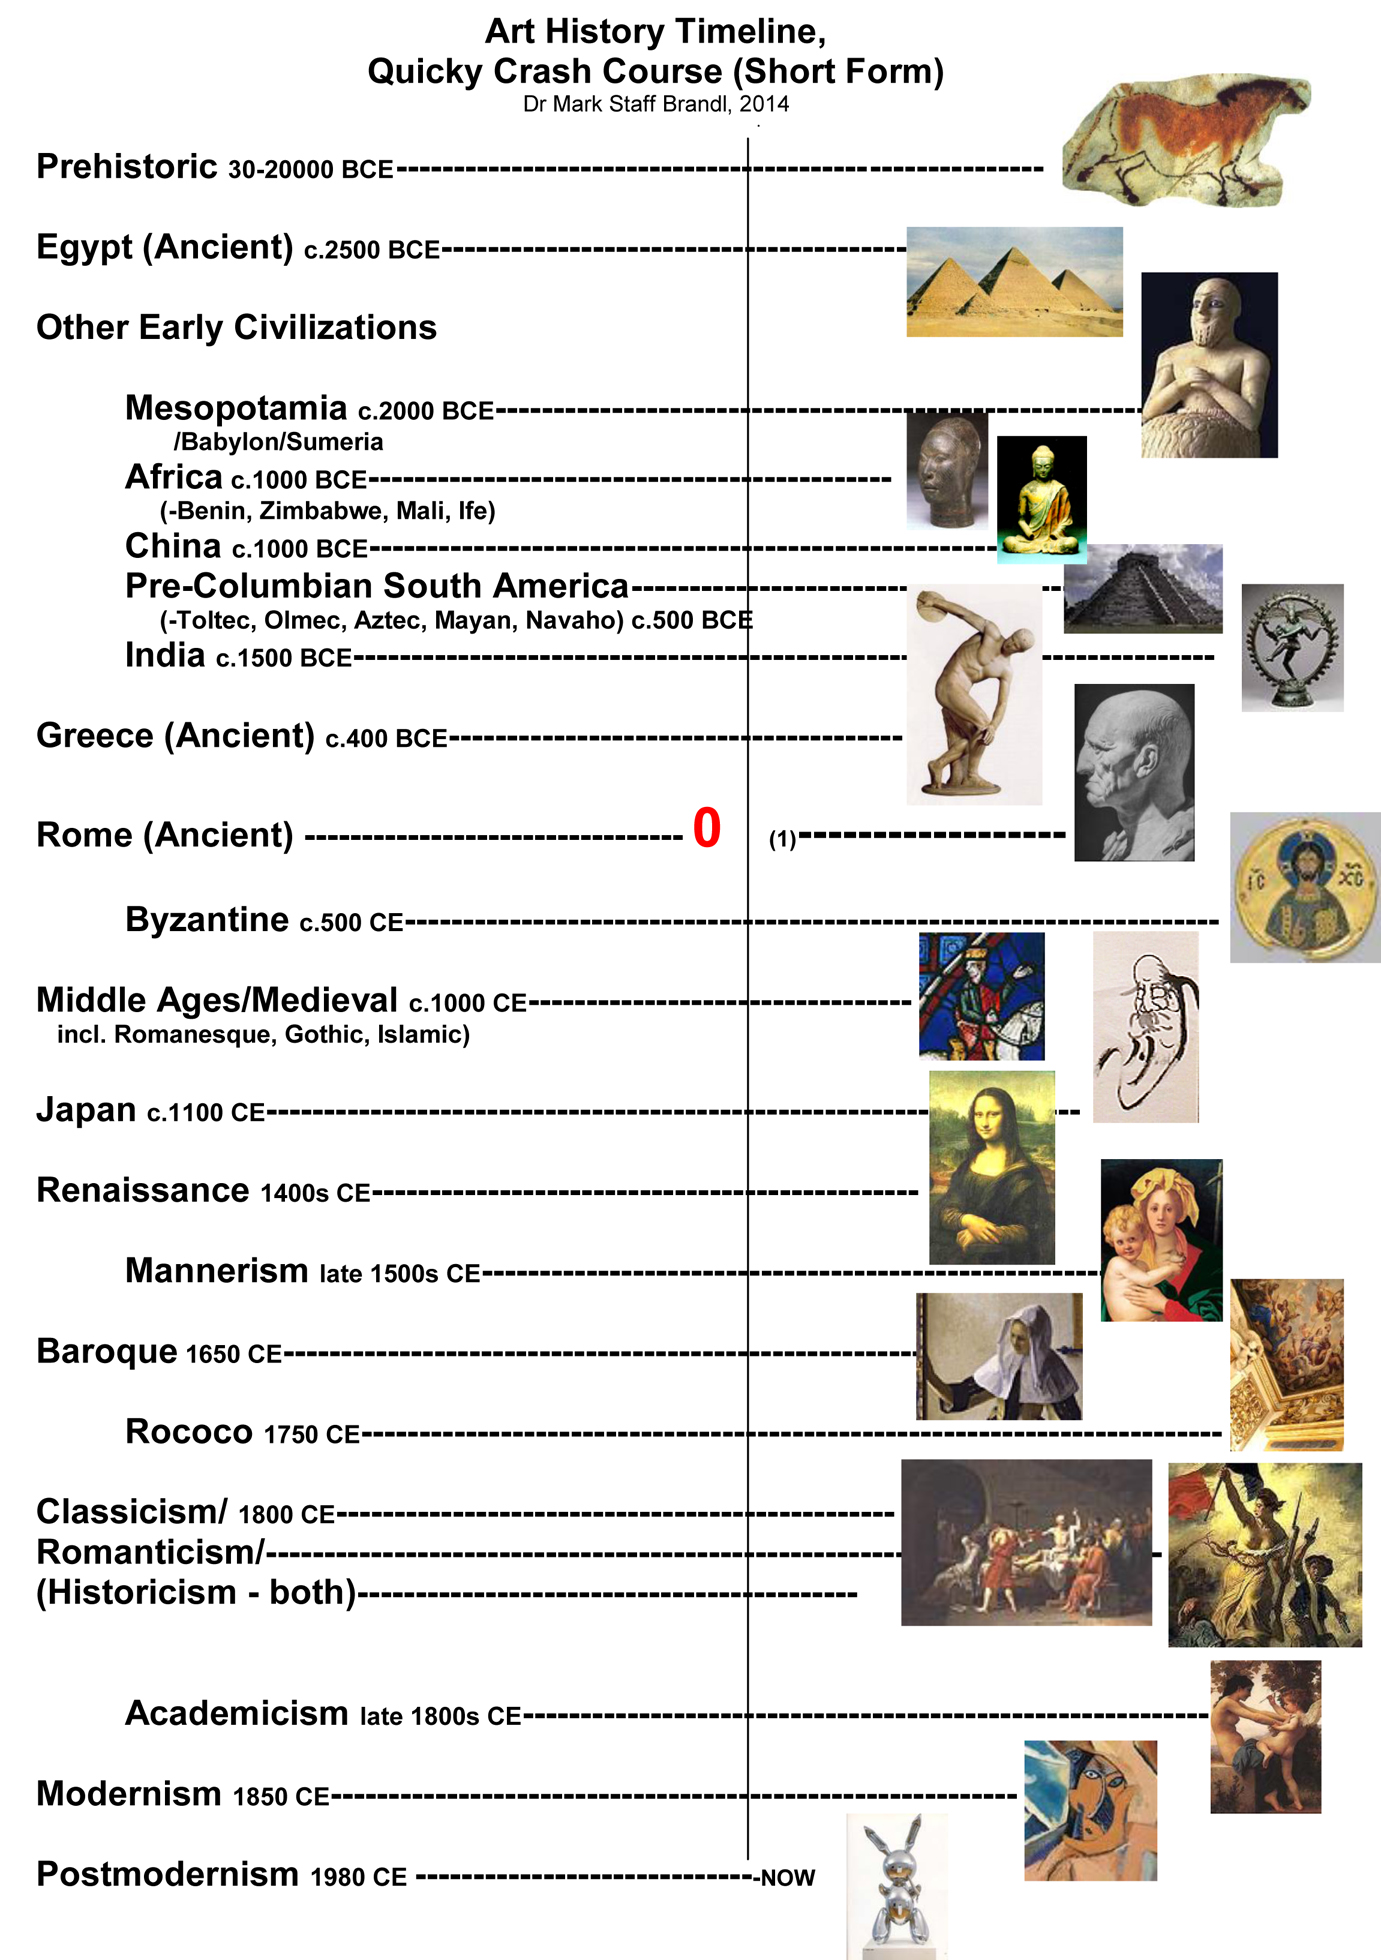
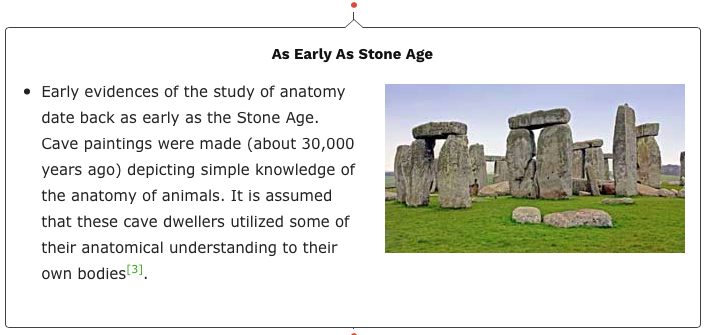
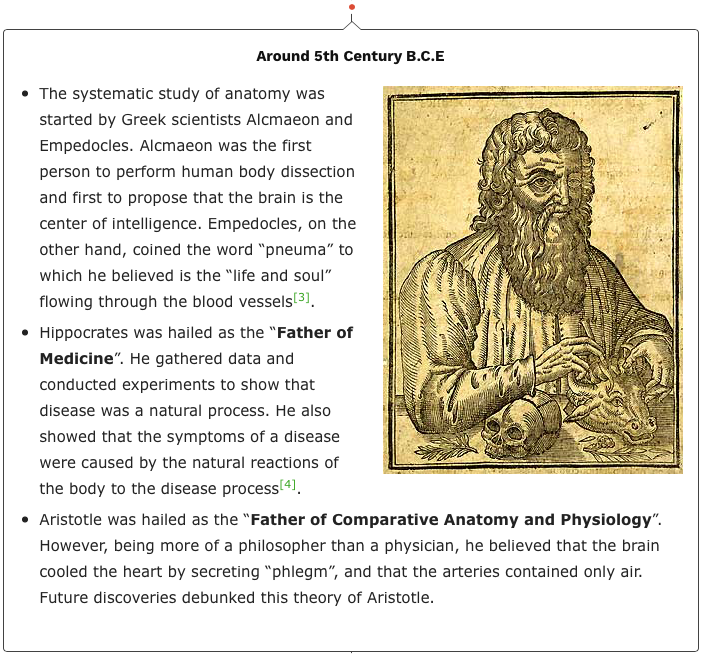
The History of Anatomy Timeline


Anatomy in the Renaissance
The relationship between artists and physicians during the Renaissance (roughly 1300 to 1600) was symbiotic (this means that the artists work helped the doctors work and the doctors work helped the artists work). Artists like Michelangelo and Leonardo Da Vinci, who were interested in exacting the human form in their art, observed physicians at work to learn the layers of muscle and bone structures that formed certain parts of the body. At the same time, physicians contracted artists to draw illustrations for the high volume of textbooks coming out in the field of anatomy, made possible by Gutenberg's invention of the printing press around 1440. Some artists even made partnerships with specific physicians, in which the physicians would allow the artists to assist in dissections (highly restricted at the time) in exchange for anatomical drawings and illustrations.
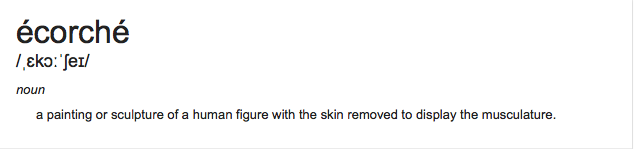
Some of the best artists even conducted their own anatomical studies, making new discoveries and expanding the field. While most artists limited their investigations to the surface of the body and observed live, nude subjects (this is called Life Drawing), some went so far as to produce écorchés. They did this by sourcing corpses and peeling back successive layers of muscle, tendons and bones, all in order to gain a better idea of how to portray the human body in their art (Leonardo Da Vinci was one of the artists who did this).
Some of the best artists even conducted their own anatomical studies, making new discoveries and expanding the field. While most artists limited their investigations to the surface of the body and observed live, nude subjects (this is called Life Drawing), some went so far as to produce écorchés. They did this by sourcing corpses and peeling back successive layers of muscle, tendons and bones, all in order to gain a better idea of how to portray the human body in their art (Leonardo Da Vinci was one of the artists who did this).
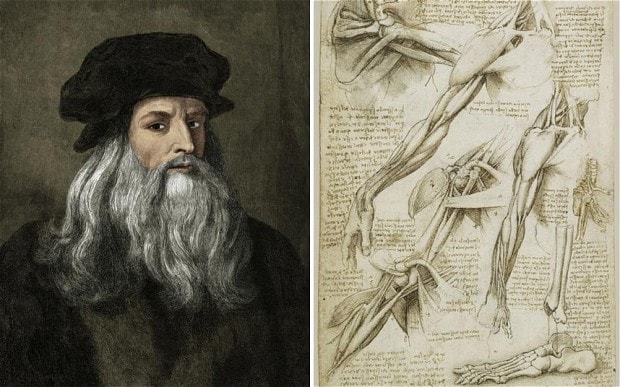
Leonardo da Vinci pushed understanding of the body further than anybody else in the Renaissance Photo: Alamy/The Royal Collection


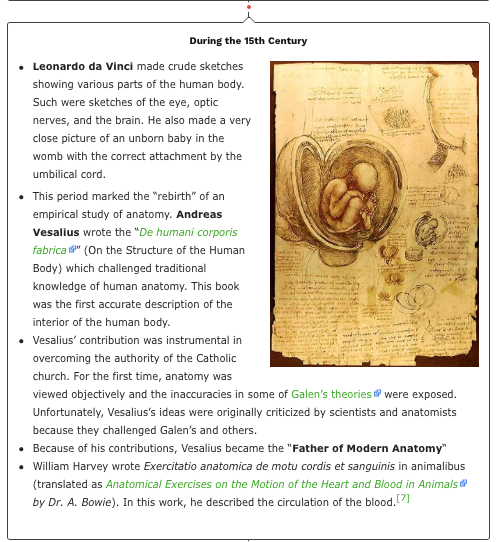
Leonardo’s interest in human anatomy can be traced back to the late 1480s, when he was court artist to Ludovico Maria Sforza, the ruler of Milan. On the 2nd day of April 1489, Leonardo began a book entitled "On the Human Form”. Its 44 pages contain several exquisite drawings of a human skull. You may recognise the image on the front cover!
In time, though, Leonardo’s attention shifted elsewhere, and he stopped working on this. This was because in the early 1490s, he became frustrated. Although he was able to get hold of a skull and live models, he had very little access to human material that he could disect, and he couldnt meet the aims he had set himself without more material. He went on to other things. For Leonardo, this meant anything from designing a massive equestrian (horse) monument commemorating Ludovico’s father Duke Francesco, to redecorating rooms in the Castello Sforzesco and painting "The Last Supper".
Leonardo was given an important commission to decorate the council chamber of the Palazzo della Signoria in Florence with a 65ft-wide mural of the Battle of Anghiari. The design involved many twisting bodies requiring a strong understanding of the human form and so Leonardo’s enthusiasm for anatomy resurfaced (around 1504).
Eventually Leonardo became a public figure with sufficient power and standing in the community to conduct post-mortem examinations whenever he wanted. Unlike in 1489, he now had access to corpses – often the bodies of executed criminals. This period marked a change in Leonardo’s career when he shifted from being an artist doing a little bit of science on the side to what he was for the last 12 years of his life: a scientist who also did a bit of art on the side.”
Lesson 3 Part 1- The Human Skeleton
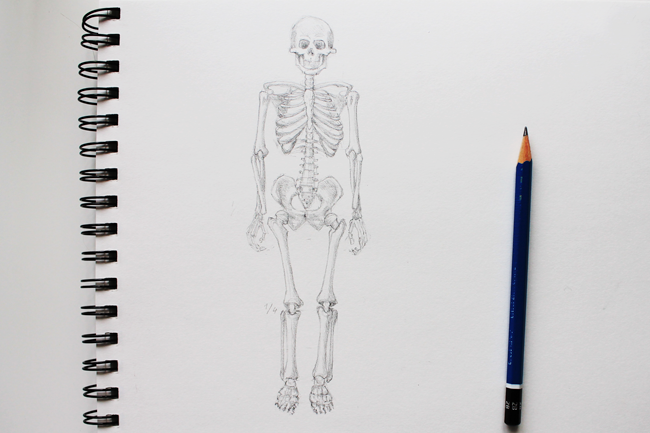
In this lesson we will be looking and and learning a little bit about the human skeleton. This is the skeleton we are probably most familiar with. One of the best ways to learn visually and notice details is to trace from an original piece. You will be given an image of a skeleton and a piece of tracing paper. Take your time with this and make sure you have recorded every detail clearly.
Lesson 3 Part 2
If you would like to try to create your own skeleton image, follow the steps below. This extra activity will really support you later in the unit but it is not compulsary!
TIPS TO DRAWING THE HUMAN SKELETON:
1. DIVIDE THE BODY INTO UNITS
1. DIVIDE THE BODY INTO UNITS

The body has a certain set of proportions that can be simplified by dividing its length into halves and quarters.
2. CREATE A WIRE-LIKE FRAME BEFORE ATTEMPTING TO DRAW DETAILS OR BONES
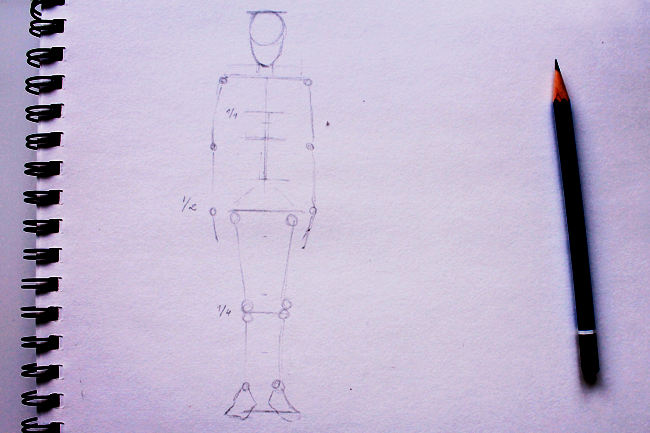
Before we start outlining real shapes and actual bones, it is preferable to draw a simple wireframe to sketch the length of all of the body parts, such as the torso, legs and arms. The important thing here is to focus solely on proportions. Don't worry about shaping anything just yet.
3. USE TRAPEZOIDS TO LOCATE THE MAIN STRUCTURES IN THE BODY
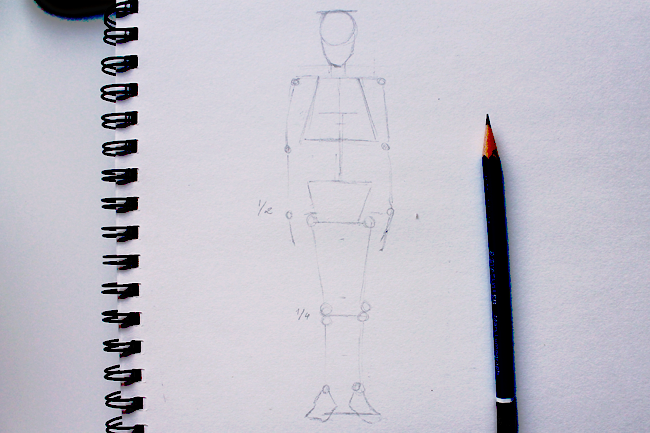
Once you have nailed the basic proportions through the wireframe, you want to define the two larger and major shapes of skeleton: the ribcage and pelvis. Represent these by drawing two trapezoids in their place.
4. IDENTIFY THE BONES
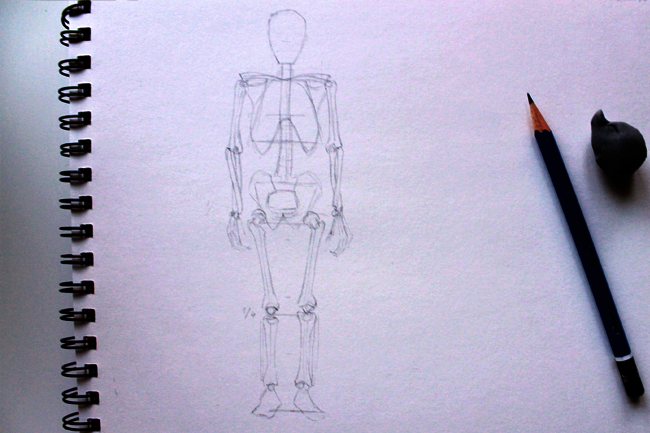
It's not absolutely necessary to know all the names of all the bones, but it is beneficial to know the main ones and especially to know their shapes and their particular directions. For example, the femur is usually slanted diagonally from the hip, and inward as it reaches the knee.
5. CHECK THE PROPORTIONS
Use these pointers to corroborate all the proportions and make sure that you are not distorting the body. This practice is especially useful when drawing from the imagination instead of a live figure or photograph.
SOME RELATIONSHIPS TO CONSIDER:
SOME RELATIONSHIPS TO CONSIDER:
- Upper leg is longer than lower leg.
- Upper arm is longer than lower arm.
- The spine begins thin and as a direct extension of the neck. It gradually becomes thicker as it reaches the pelvis, as it is the most weight-bearing part of this section.
- The pelvis is located half-way up the figure.
- If you are drawing relaxed hands, they will typically reach halfway down the femur.
- The navel can be found halfway between the center of the ribcage and the bottom of the pelvis.
Lesson 4- The Reptile & Amphibian Skeleton
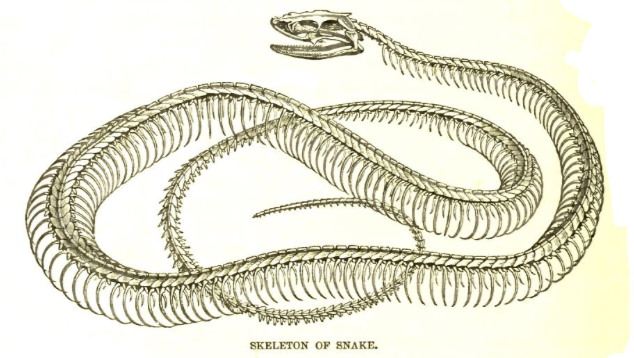
Different creatures have very different skeletal and muscular structures from each other. This is why it was so important that physicians were able to perform dissections on humans in order to move human medicine forward. In this lesson, we will be studying the reptile and amphibian skeleton. I will give you a few examples to trace in class until you get the hang of it. Once you are feeling confident, I would like you to try to draw one or two of the skeletons in the pictures below.
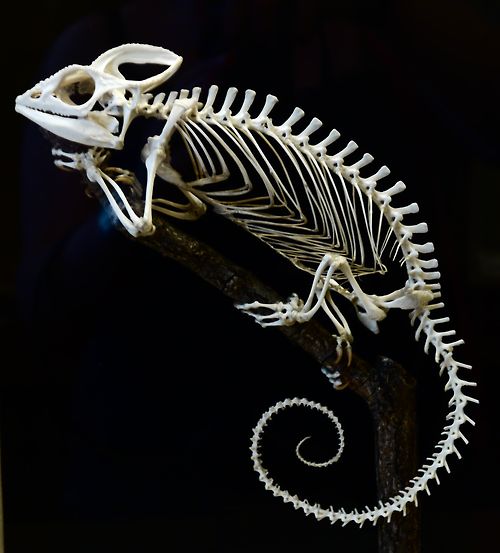
Iguana Skeleton

Lizard Skeleton
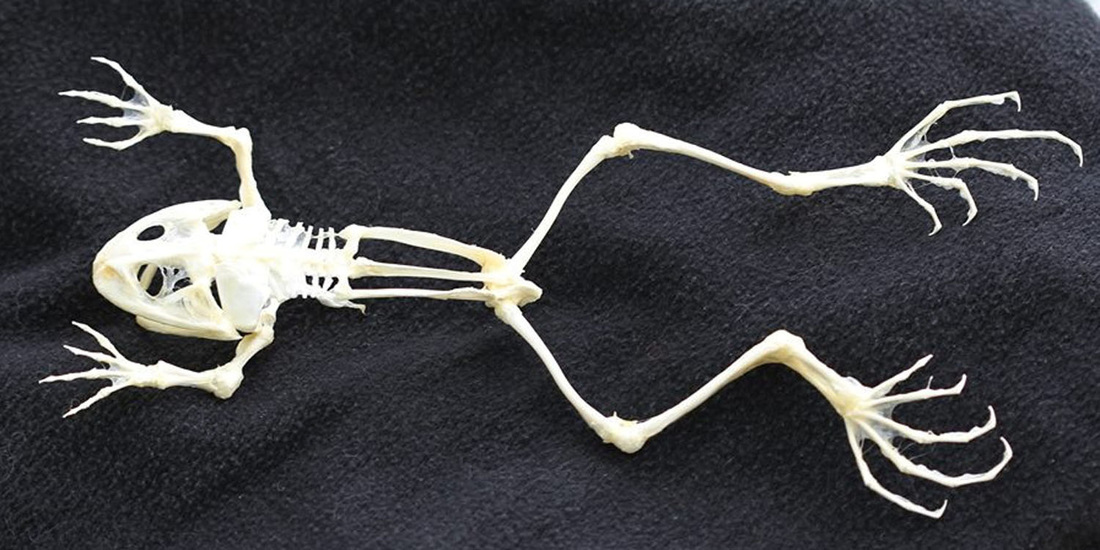
Frog Skeleton
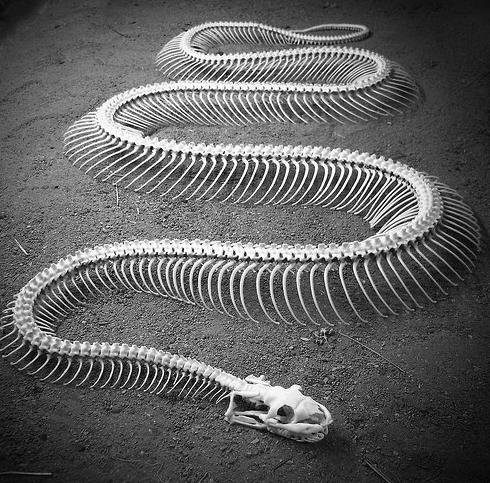
Snake Skeleton
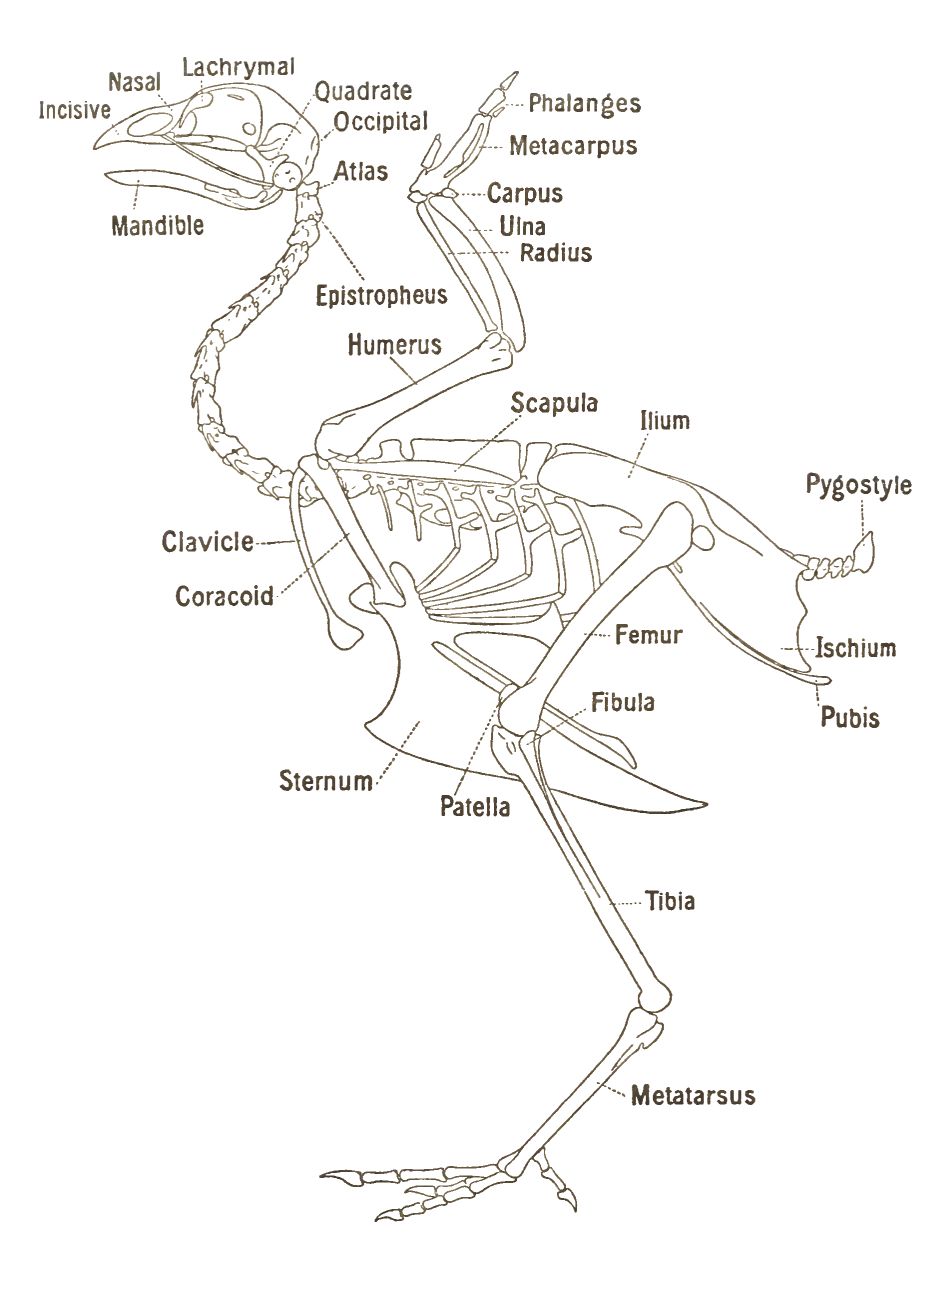
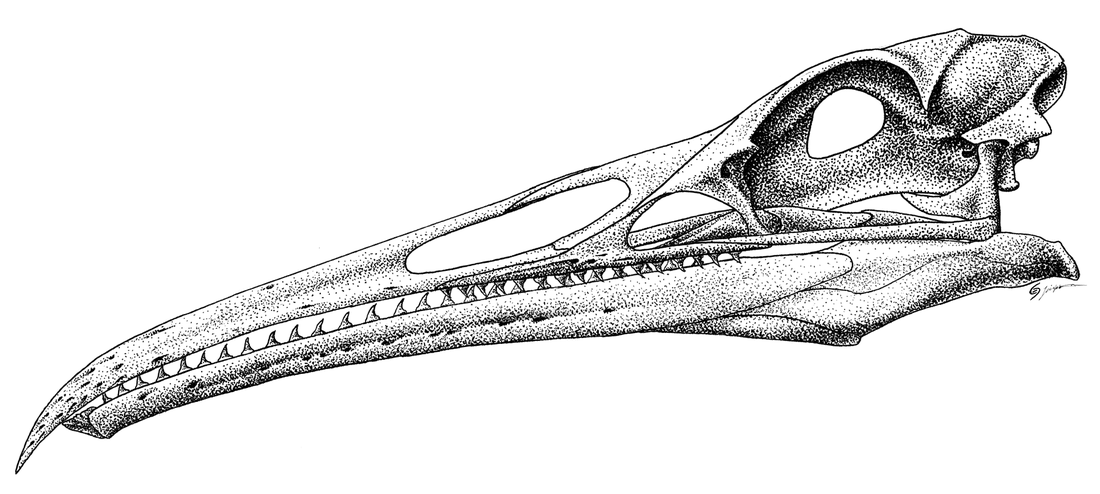
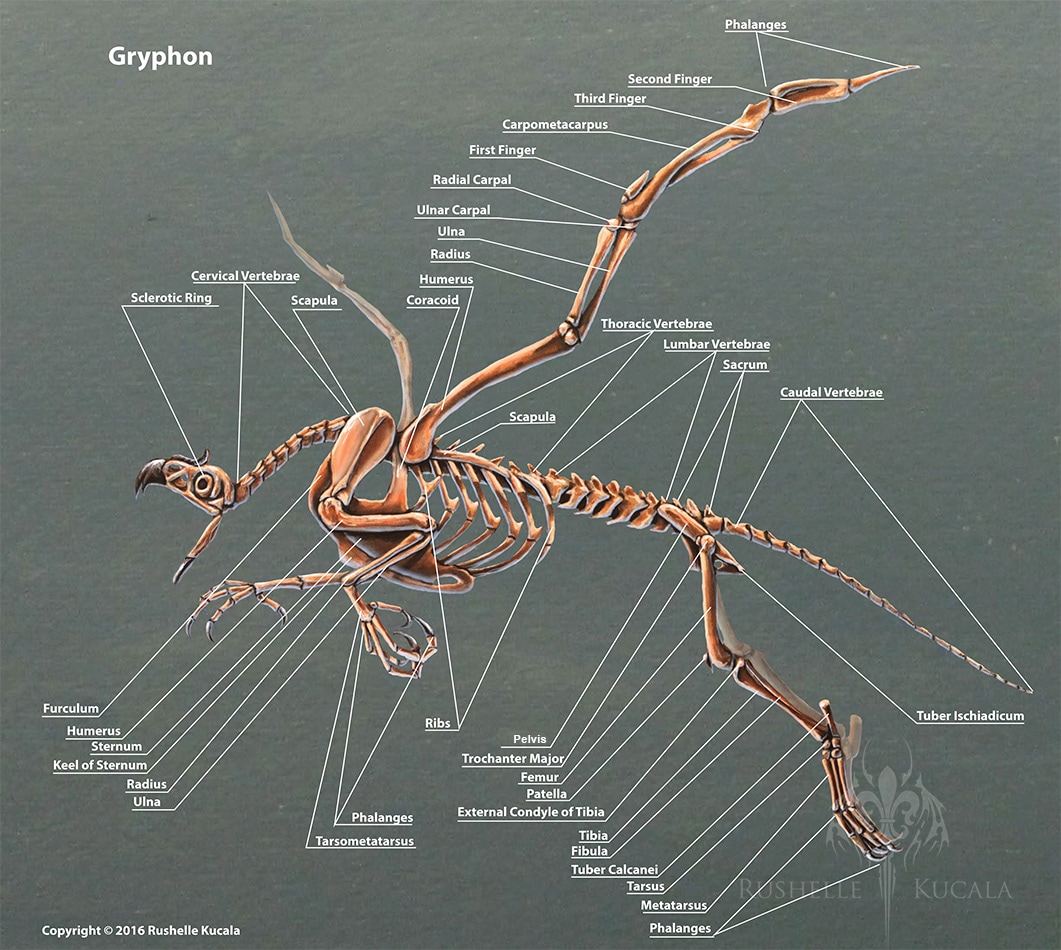
Lesson 5- The Bird Skeleton
In this lesson, we will be studying the bird skeleton- these are quite different from reptiles and amphibians. I will give you hard copies of these examples to trace in class.
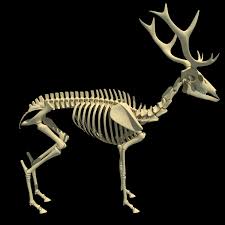
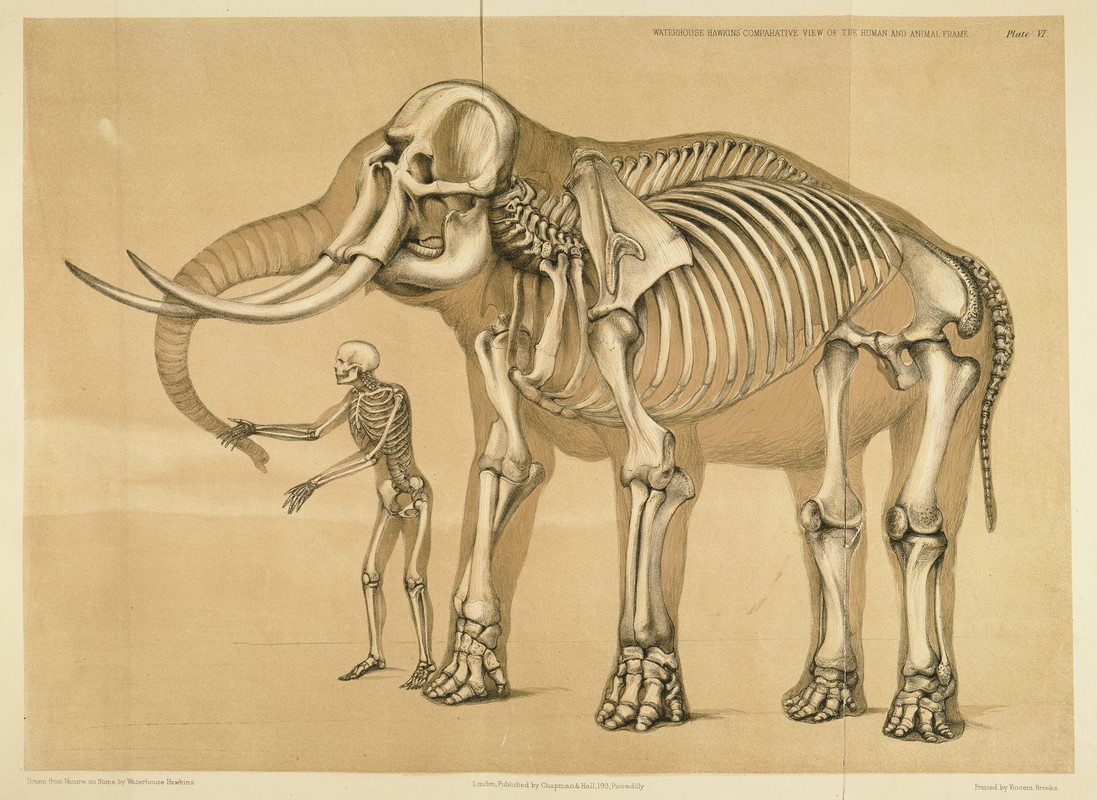
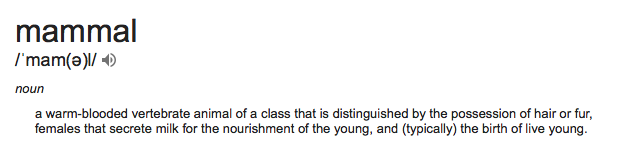
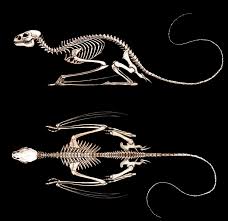
Lesson 6- The Mammal Skeleton (excluding humans)
In this lesson, we will be studying the skeleton of other mammals. I will give you a few examples to trace in class.
Lesson 7- The Human Muscular System
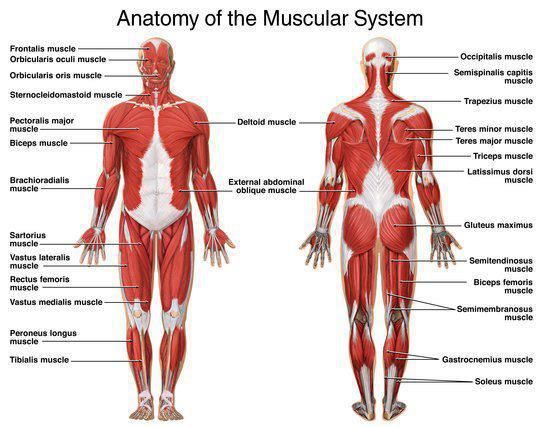
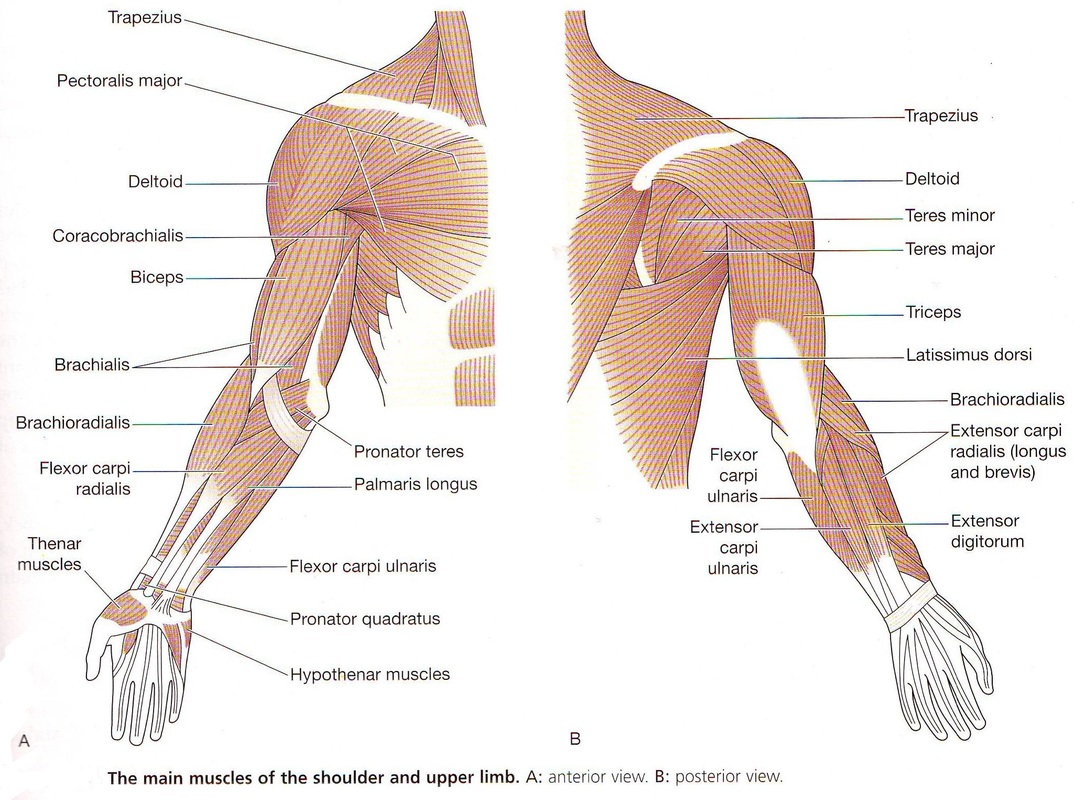
Above there are two images of the human muscular structure. This sits on top of the skeleton. You will be given tracing paper for this activity and a hard copy of both of the images above. Begin by tracing the each image. Then photocopy each drawing onto A4 paper and colour and label the work.
Lesson 8- The Muscular System of Other Common Animals, Amphibians and Birds
Now we are going to look at the muscular systems of other animals. These can vary quite a lot depending on the shape, size and movement of different species. I will give you a few examples to trace in class until you get the hang of it, then I expect you to select one or two animals from the images below to copy or find one or two of your own to recreate.
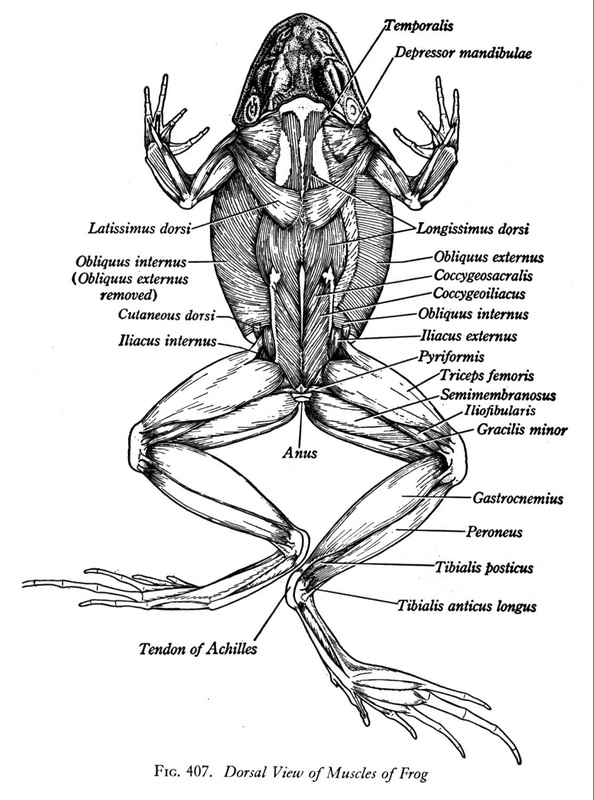
Frog Muscular System
Horse Muscular System
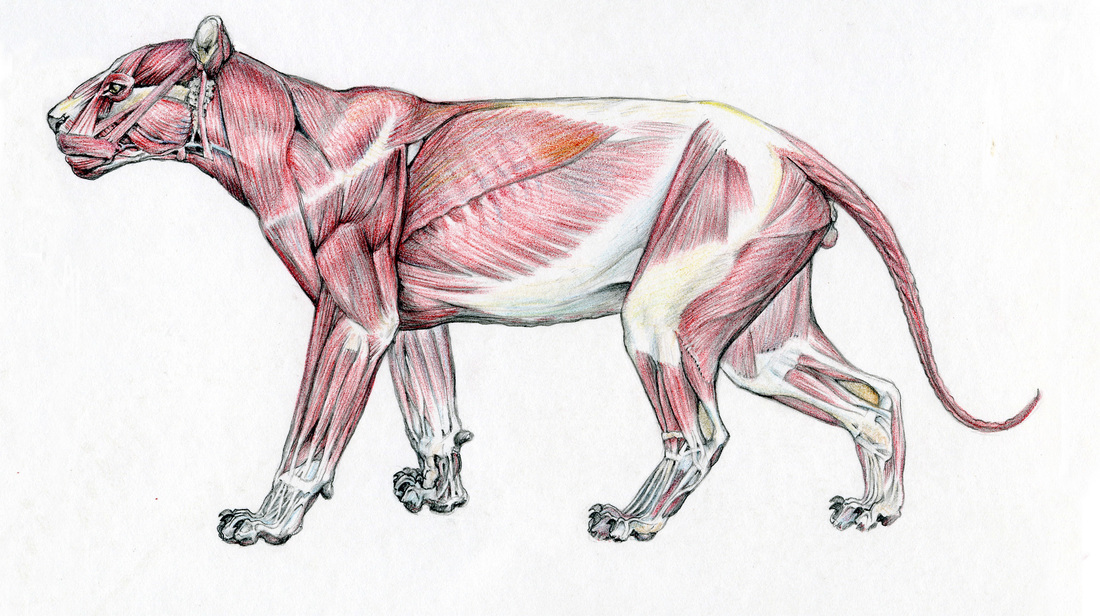
Lion Muscular System
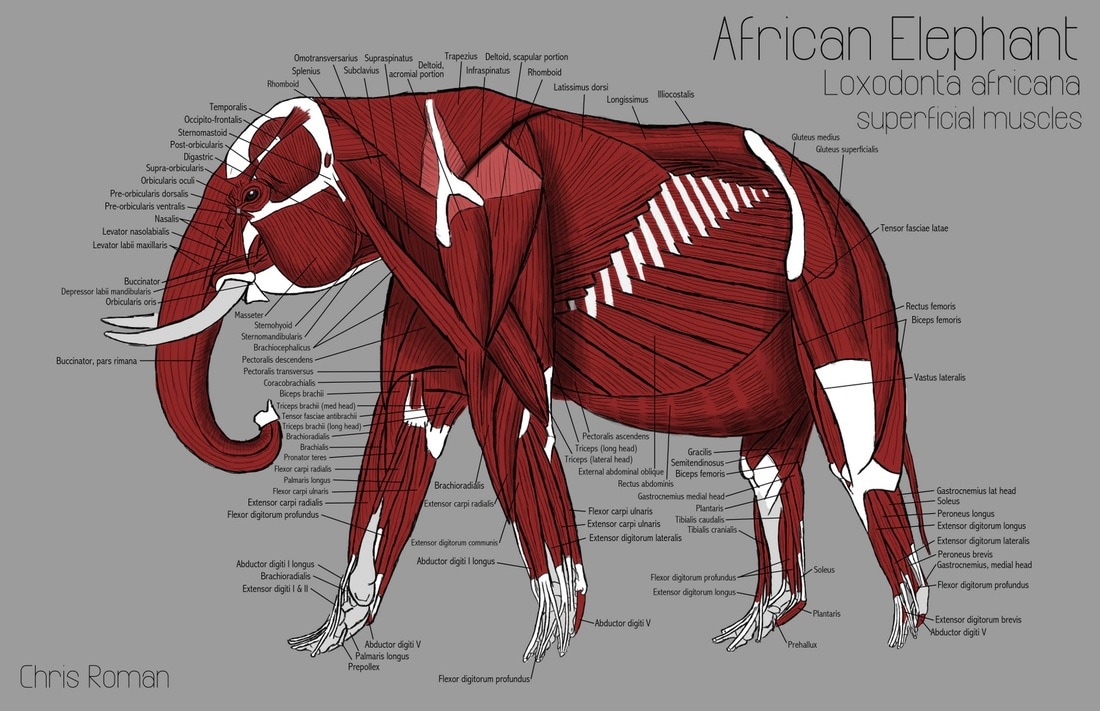
Elephant Muscular System
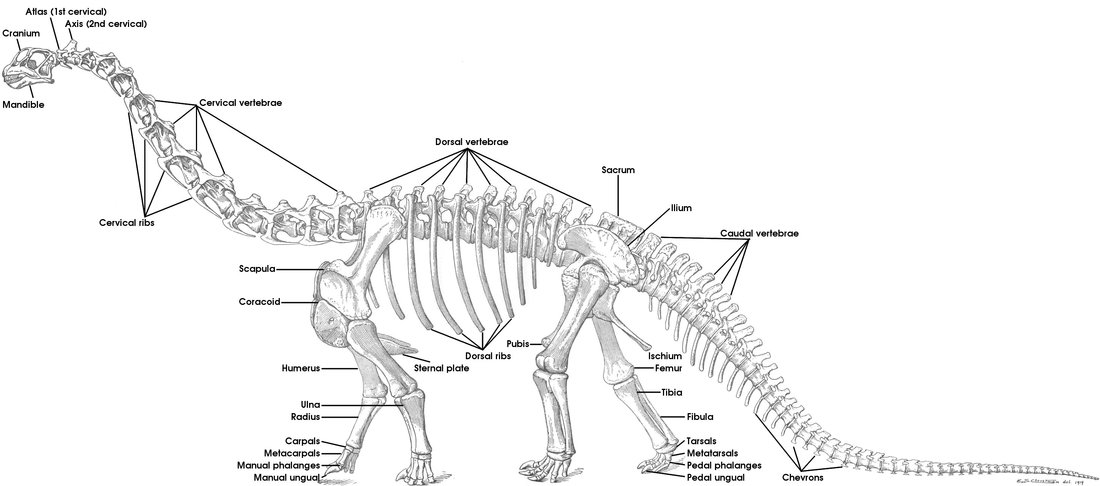
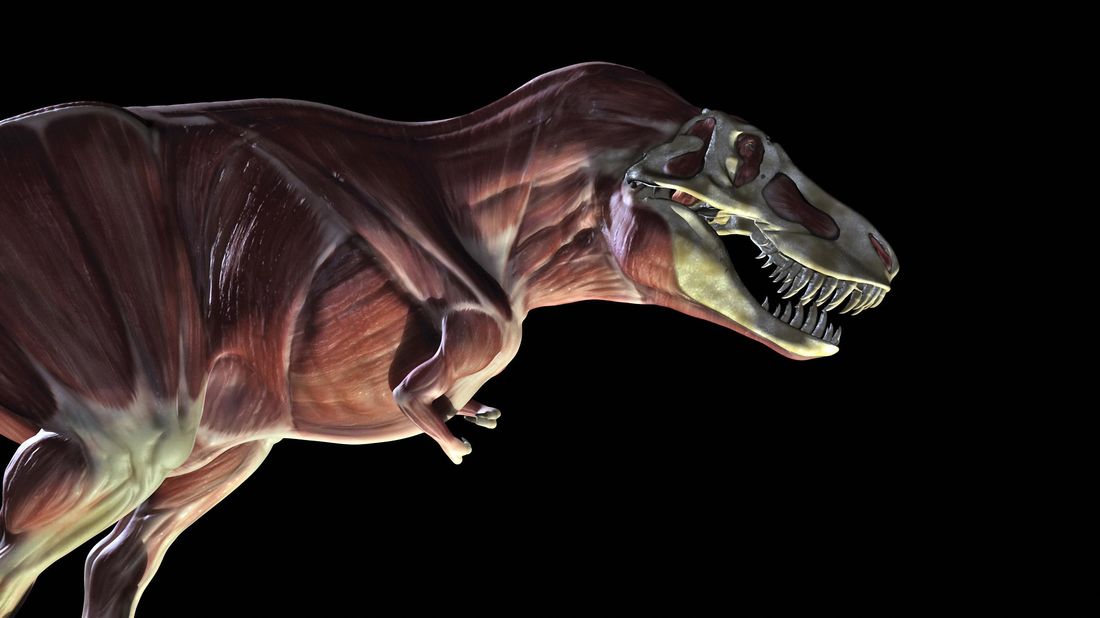
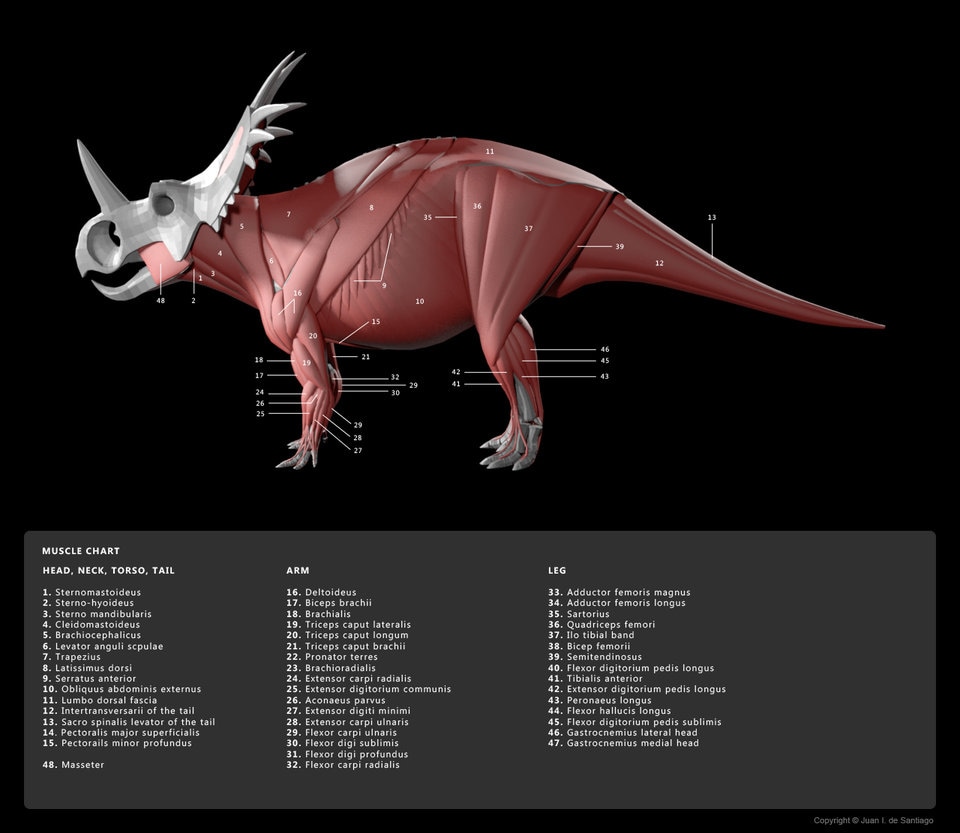
Lesson 9- The Muscular System of Dinosaurs
Now we are going to look at the muscular systems of Dinosaurs. These can vary quite a lot depending on the shape, size and movement of different species. I will give you hard copies of these examples to trace in class to give you an idea of these structures.
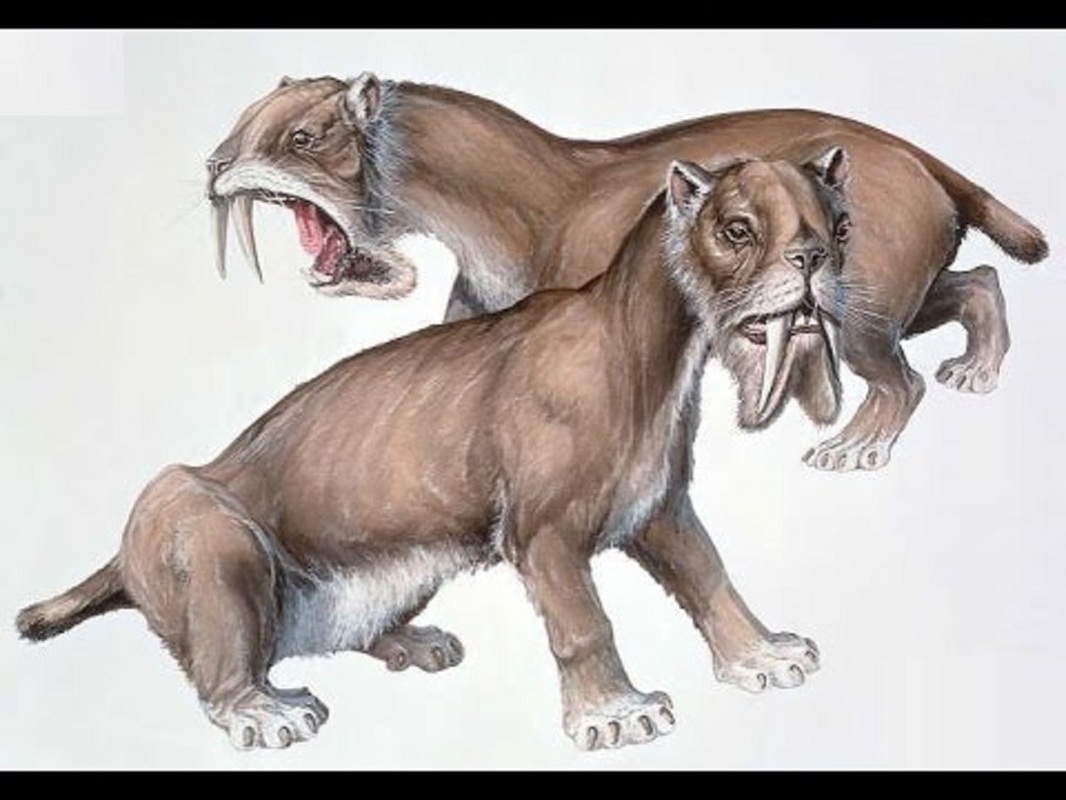
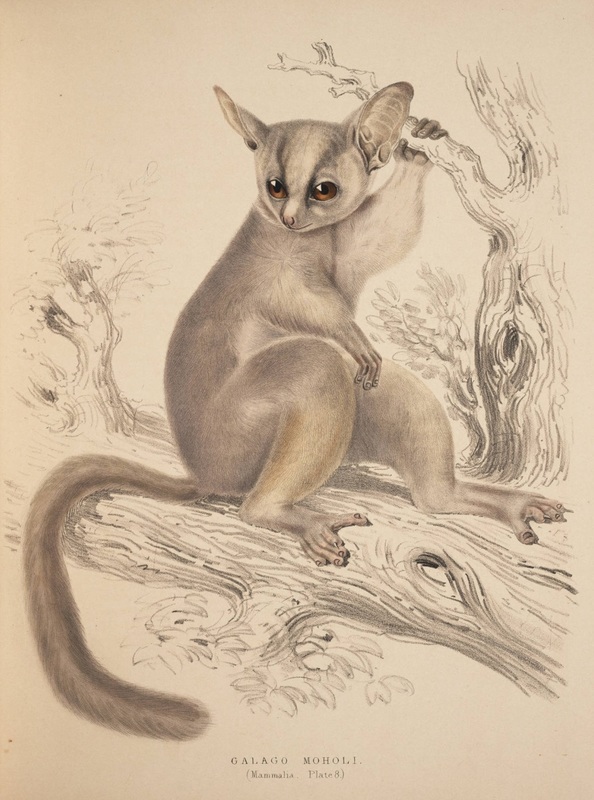
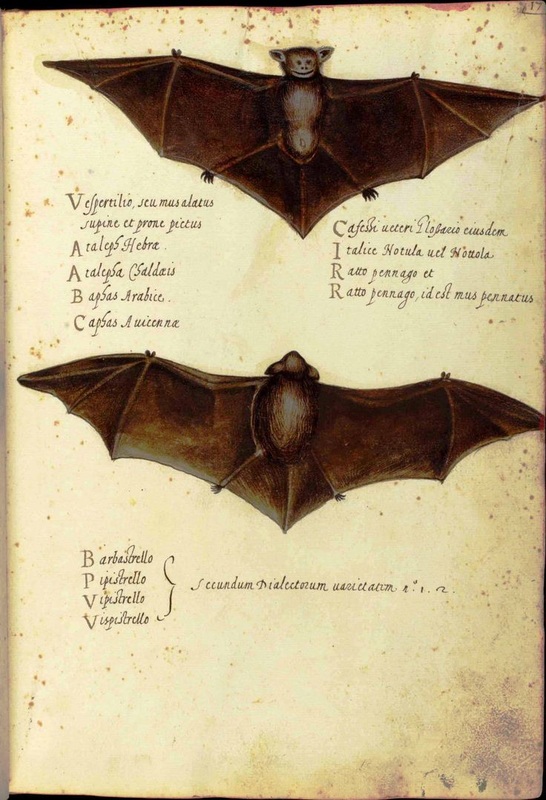
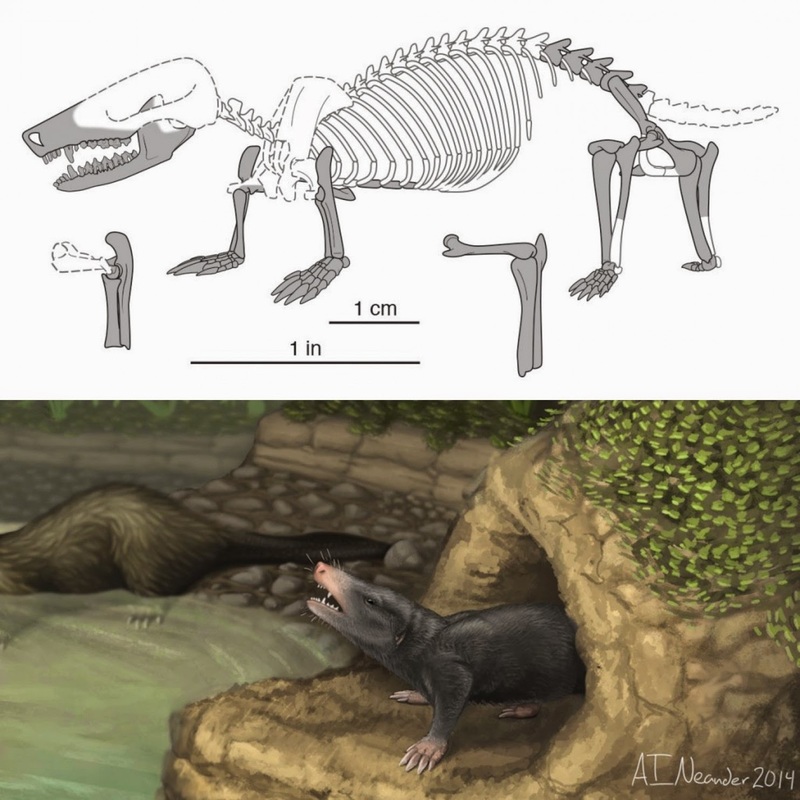
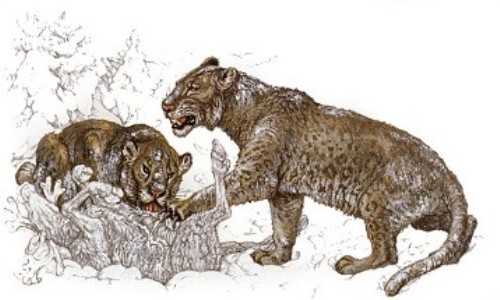
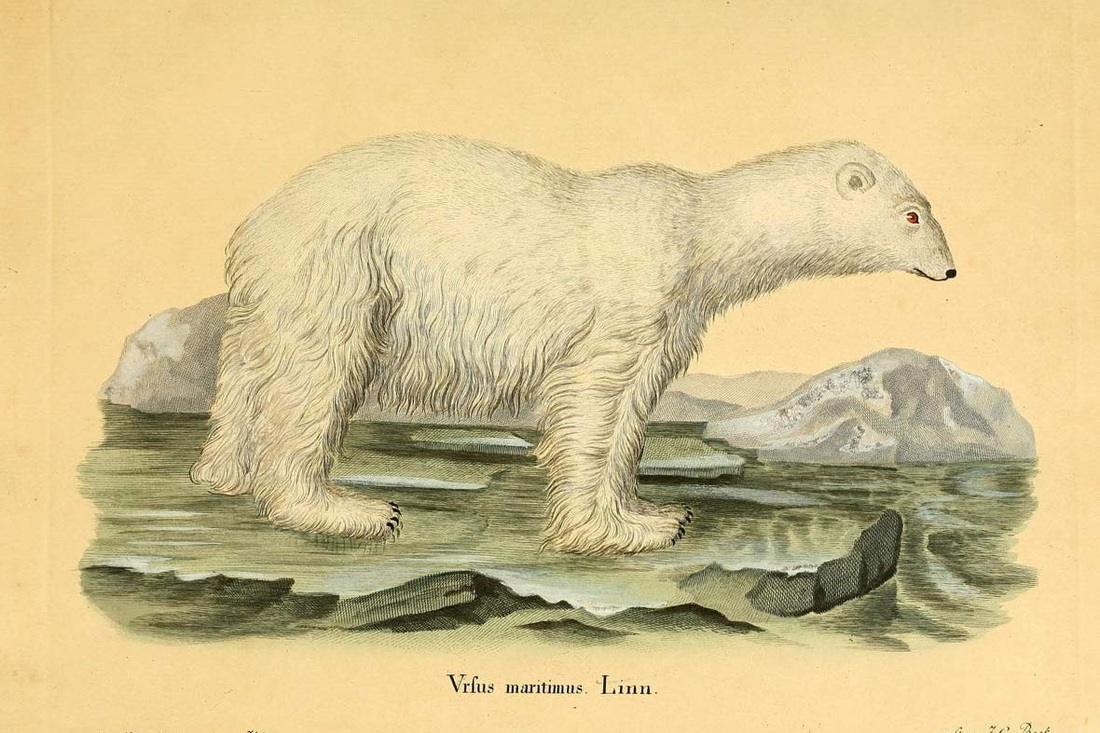
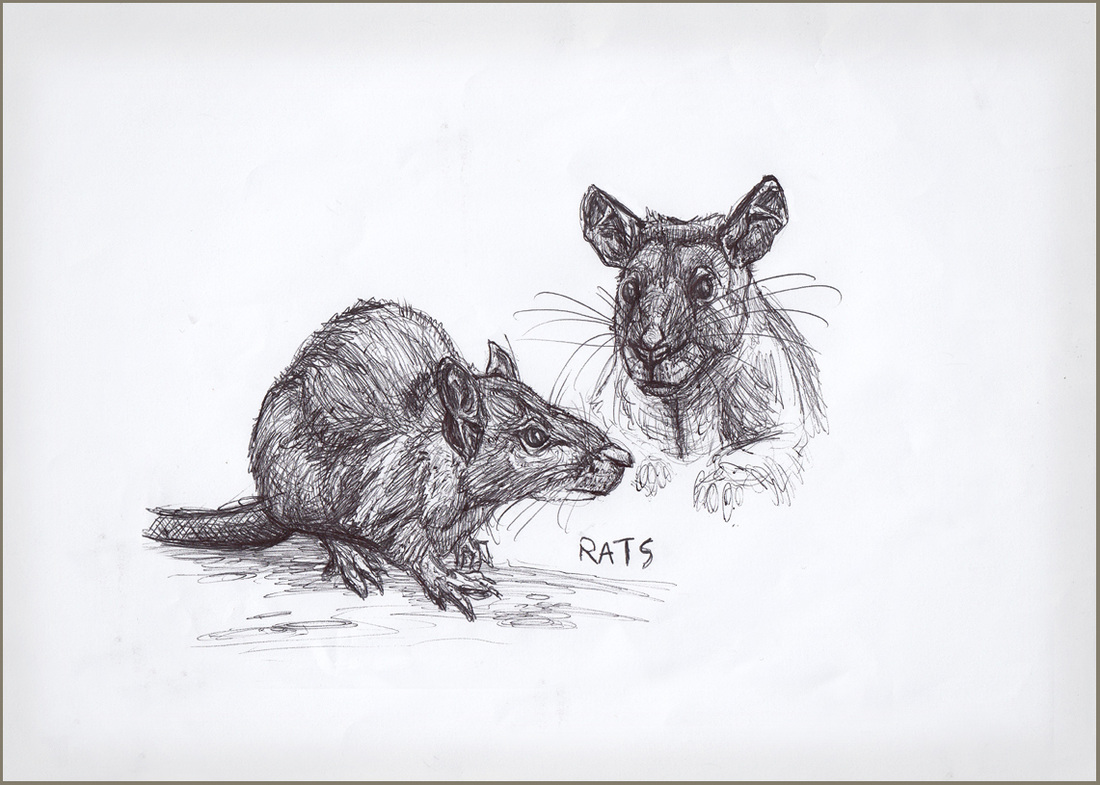
Lesson 10- Life Sketches of Mammals
Biological and Zoological Life Sketches tend to have a similar feel about them. There are 3 options when it comes to drawing an animal as a life sketch.
You either-
You either-
- Draw the animal with no background and focus completely on the animal itself.
- Draw the animal with no background but with a comparison of either a small analytical drawing, the skeleton structure or the muscular structure.
- Draw the animal in its natural habitat performing some behaviour- this could be hunting, nursing its infants, climbing, flying etc. (whatever you want to highlight about the creature)
Task
Pick a mammal from the images above or find a biological life sketch of a mammal of your choosing and create your own Biological Life Sketch.
Pick a mammal from the images above or find a biological life sketch of a mammal of your choosing and create your own Biological Life Sketch.
Lesson 2- Research and Presentation Prep
You will be creating a powerpoint presentation (or a prezi presentation) to perform in front of the class about the history of Anatomy and how it links to Art.
Craft the Beginning
Start by describing life as the audience knows it-
People should be nodding their heads in recognition because you’re telling them what they already understand. This creates a bond between you and them, and opens them up to hear how things have changed and what things used to be like- it also gives your comparison some context. After you set that baseline of what is, introduce how it all began. The gap between the two will throw the audience a bit off balance, and that’s a good thing. Once you establish that gap (between the early beginnings and how advanced we are now), use the rest of the presentation to bridge it (to explain what happened between then and now).
Develop the Middle
As the people in your audience realize how different things were at different stages in the history of Anatomy, keep playing up the contrast between what is now and what was at that specific time in history. This all has to be in chronological order (in the order things happened). Dont forget to highlight how art and science worked together at different stages in history!
Make the Ending Powerful
Make it inspiring so people will want to know more. Describe what could be in the future based on how far science has come: how much better the world will be when further innovations in Anatomy are made (possibly micro anatomy). By defining future possibilities, you highlight that where we are in history is not the end point and that progression comes from continually moving forward.
- Your presentation should be approximately 2 minutes long
- Your visual presentation will not include words (excluding titles)
- You will use cue cards (with simple notes) and learn your speech as well as you can
Craft the Beginning
Start by describing life as the audience knows it-
- What we know about Anatomy now
- What non invasive (from outside the body) technologies we have that allow us to see inside the human body etc.
People should be nodding their heads in recognition because you’re telling them what they already understand. This creates a bond between you and them, and opens them up to hear how things have changed and what things used to be like- it also gives your comparison some context. After you set that baseline of what is, introduce how it all began. The gap between the two will throw the audience a bit off balance, and that’s a good thing. Once you establish that gap (between the early beginnings and how advanced we are now), use the rest of the presentation to bridge it (to explain what happened between then and now).
Develop the Middle
As the people in your audience realize how different things were at different stages in the history of Anatomy, keep playing up the contrast between what is now and what was at that specific time in history. This all has to be in chronological order (in the order things happened). Dont forget to highlight how art and science worked together at different stages in history!
Make the Ending Powerful
Make it inspiring so people will want to know more. Describe what could be in the future based on how far science has come: how much better the world will be when further innovations in Anatomy are made (possibly micro anatomy). By defining future possibilities, you highlight that where we are in history is not the end point and that progression comes from continually moving forward.
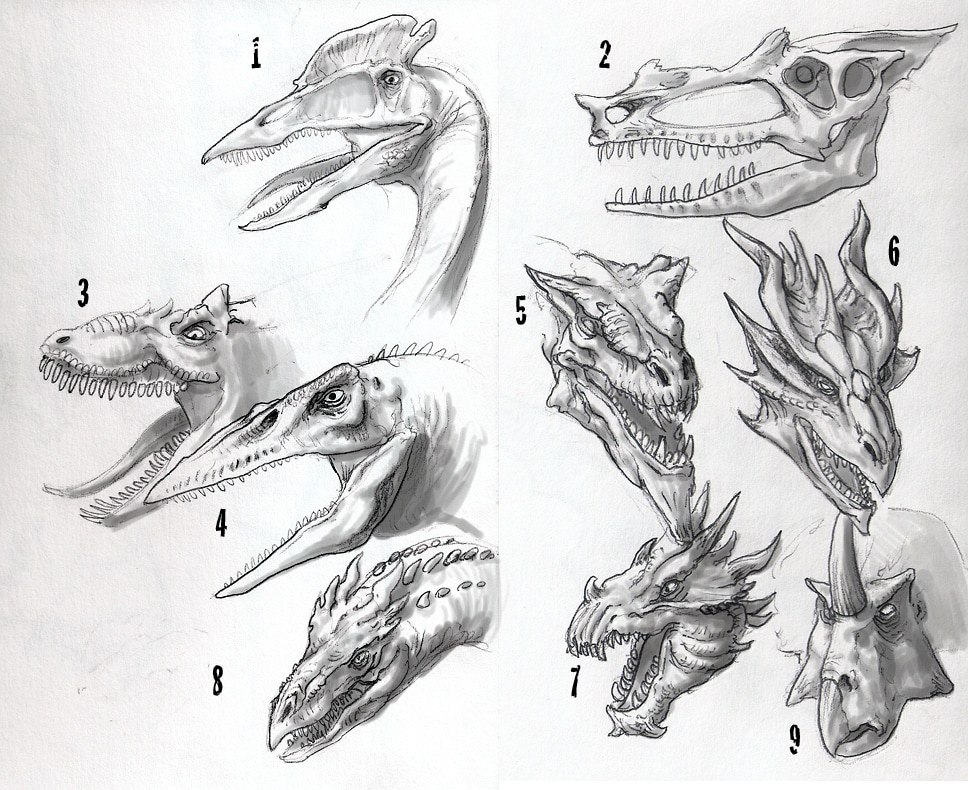
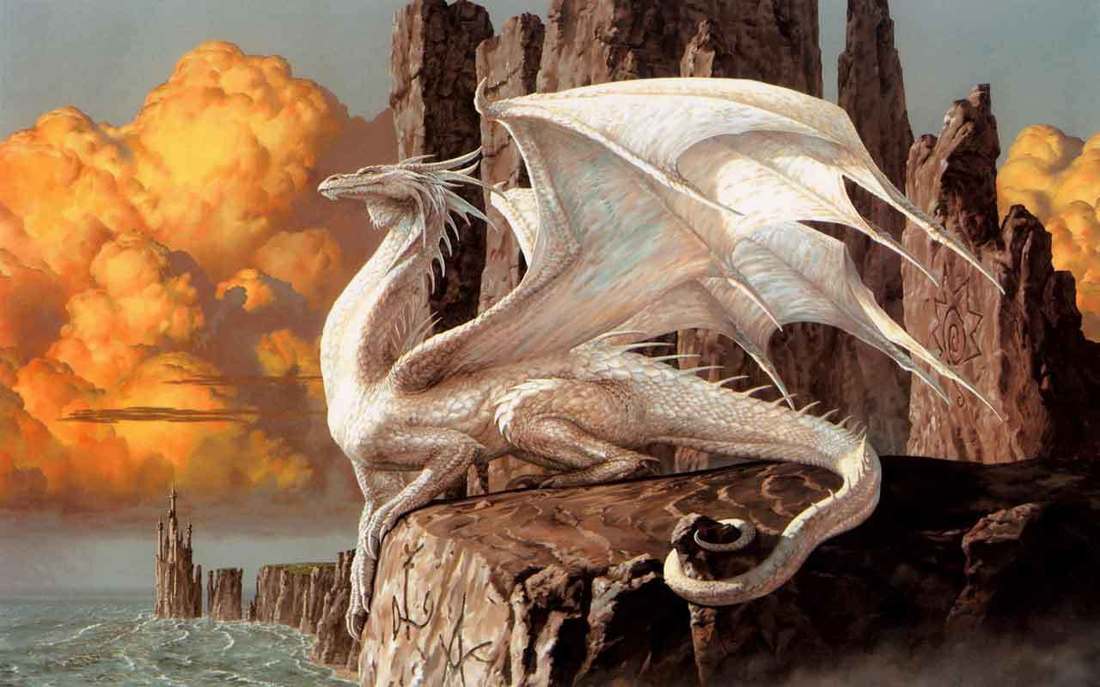
Lesson 11- Dragons (what makes a Dragon a Dragon?)
What is a dragon? Nearly every culture in the world has a mythical creature that might be described as a dragon. And since the whole world knows the general concept, the actual definition of a dragon can be pretty vague.
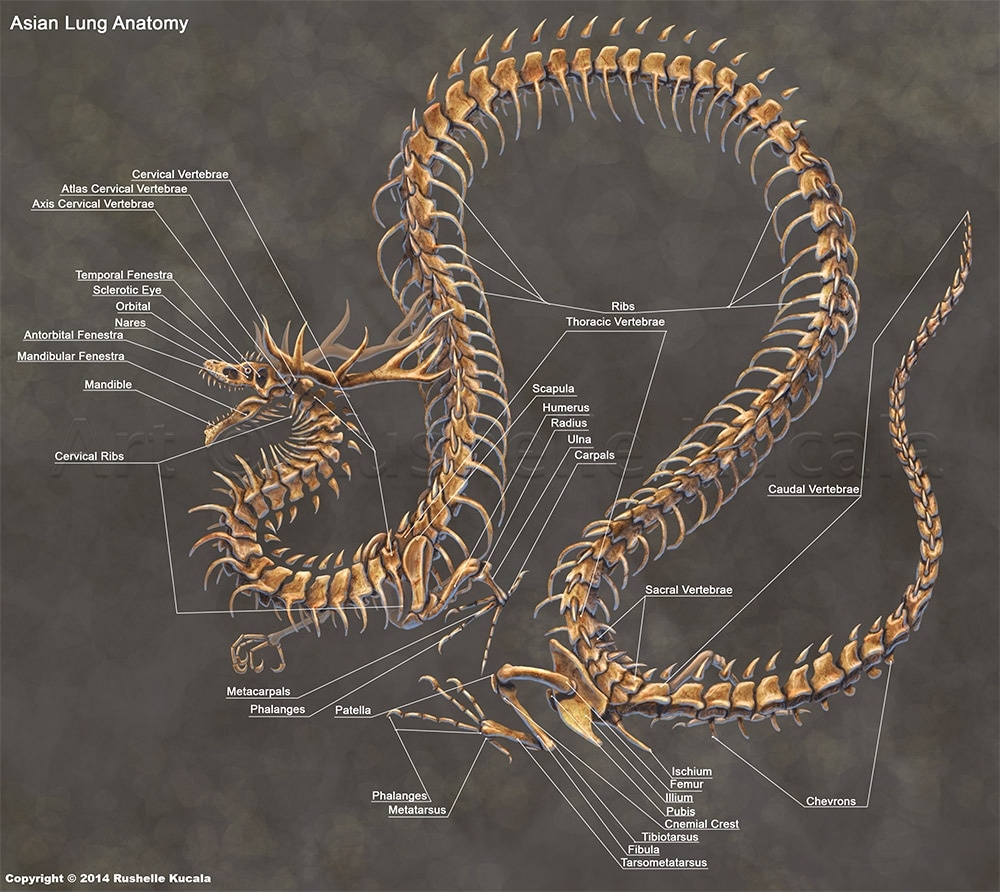
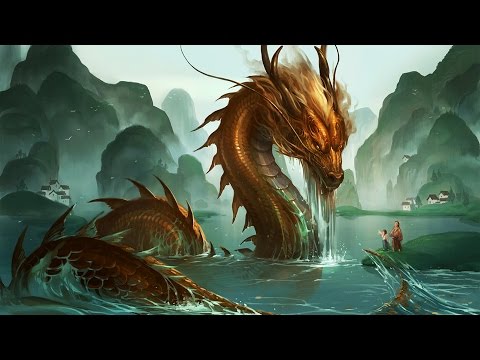
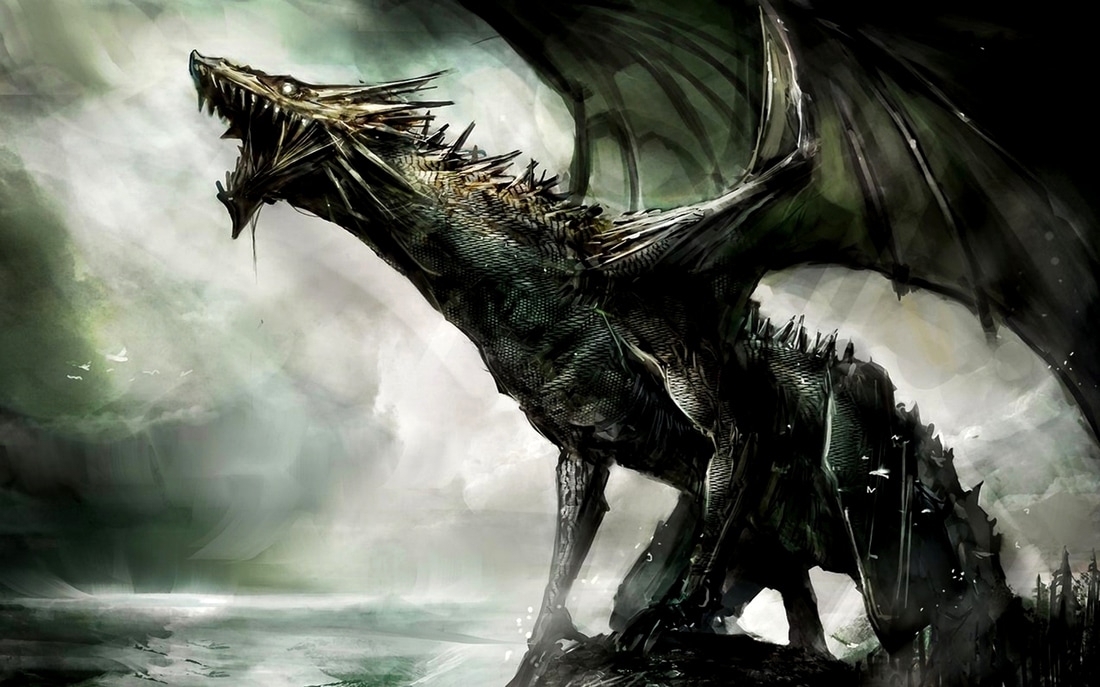
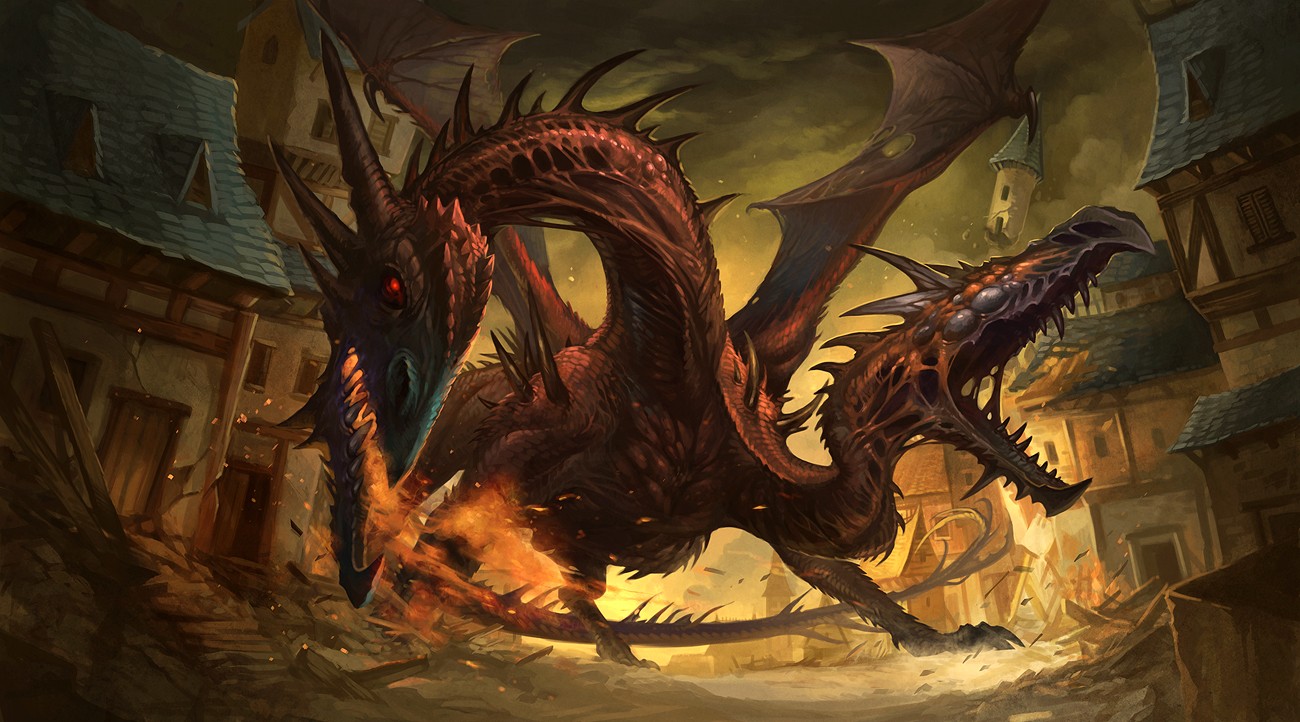
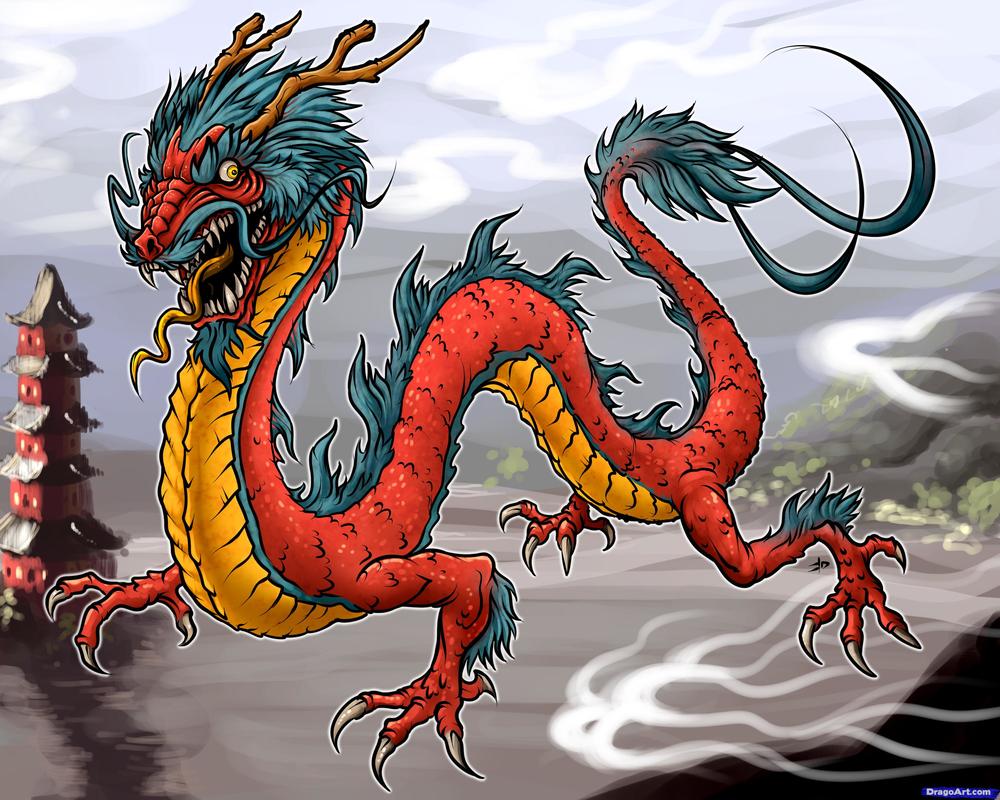
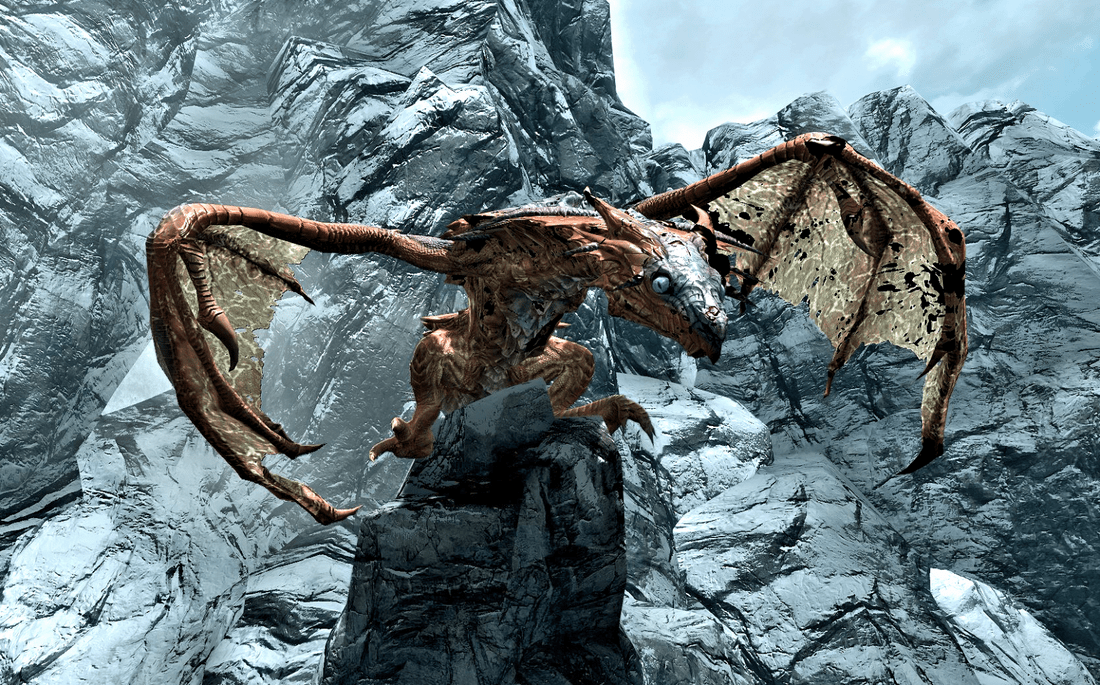
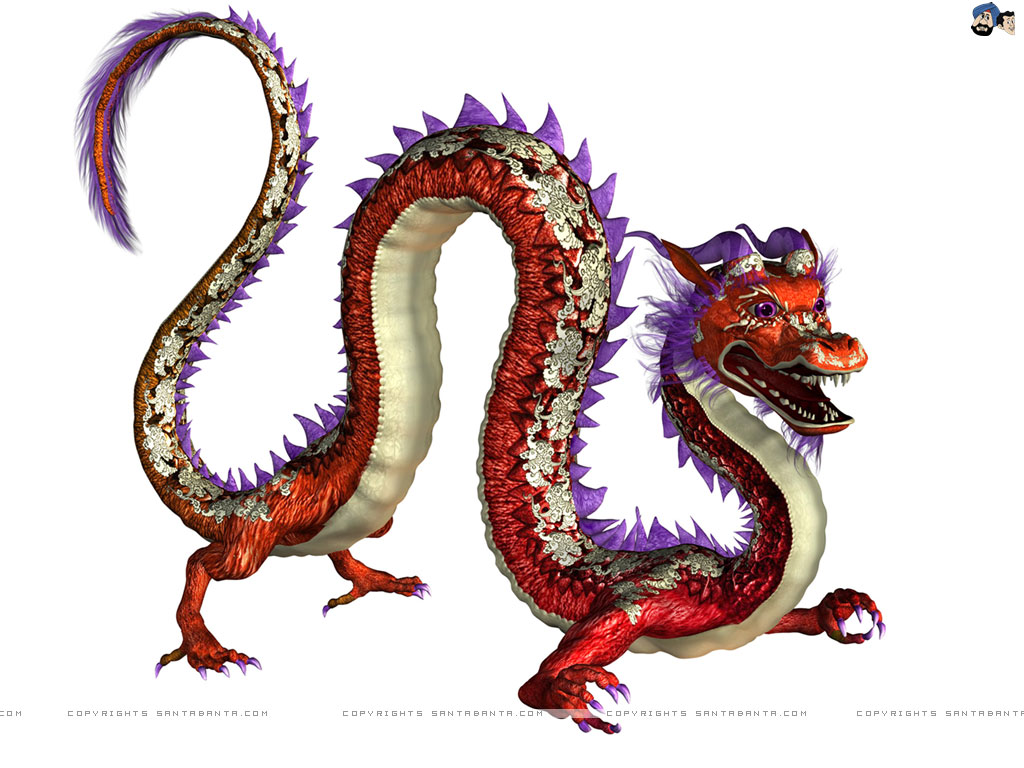
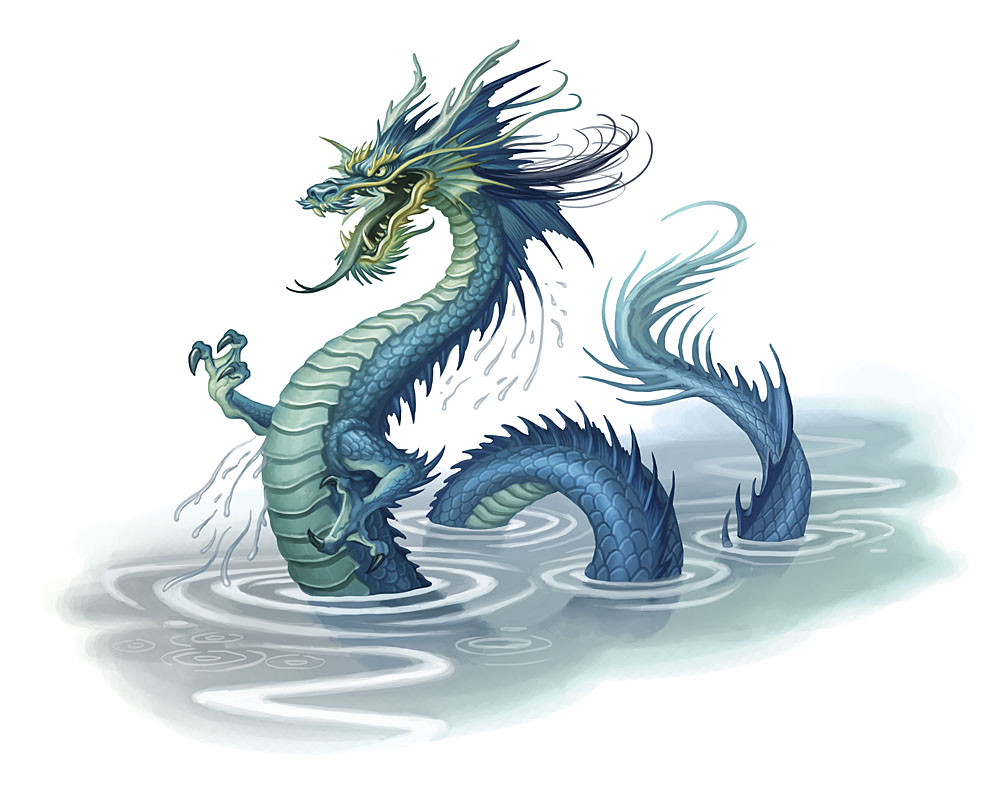
There are two commonly referenced types of dragons, though: Western dragons, the monstrous, four-footed dinosaurs with wings on their backs; and Eastern dragons, the peaceful, long-bodied animal medleys that fly with magical levitation. Dragons almost always have reptilian traits, and are usually large, powerful creatures. When a fantasy book mentions a “dragon”, we can still have a general idea of what to expect.
Because so many cultures developed dragon-like creatures independantly of each other, it has been suggested that the dragon represents something fundamental in the human psyche. We have a tendancy to look at snakes, crocodiles, predatory birds and large cats and be awed, so ancient humans all took that inspiration in a similar direction. They invented dragons that were to be respected, either for their terrible evil or for their godly wisdom.
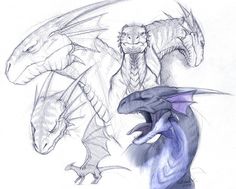
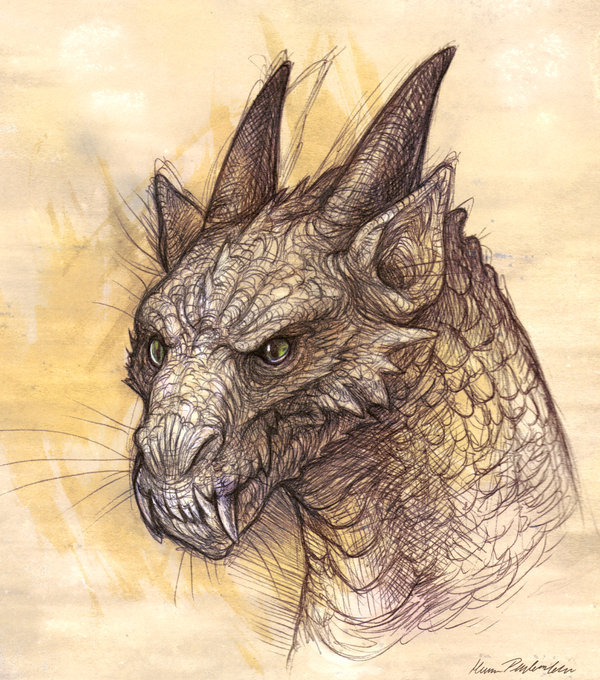
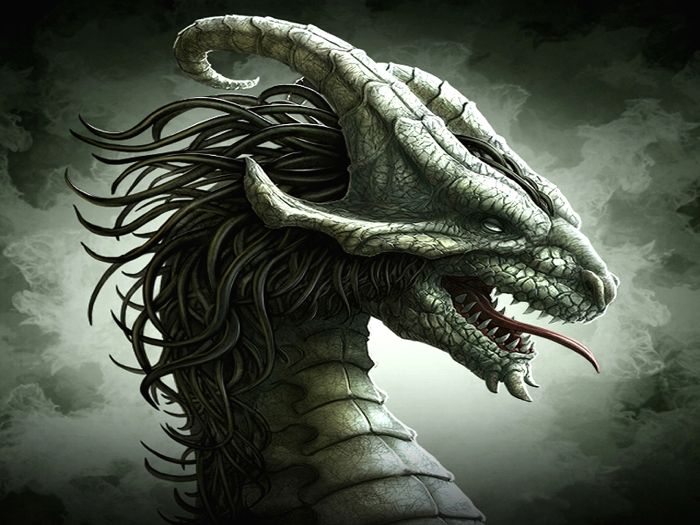
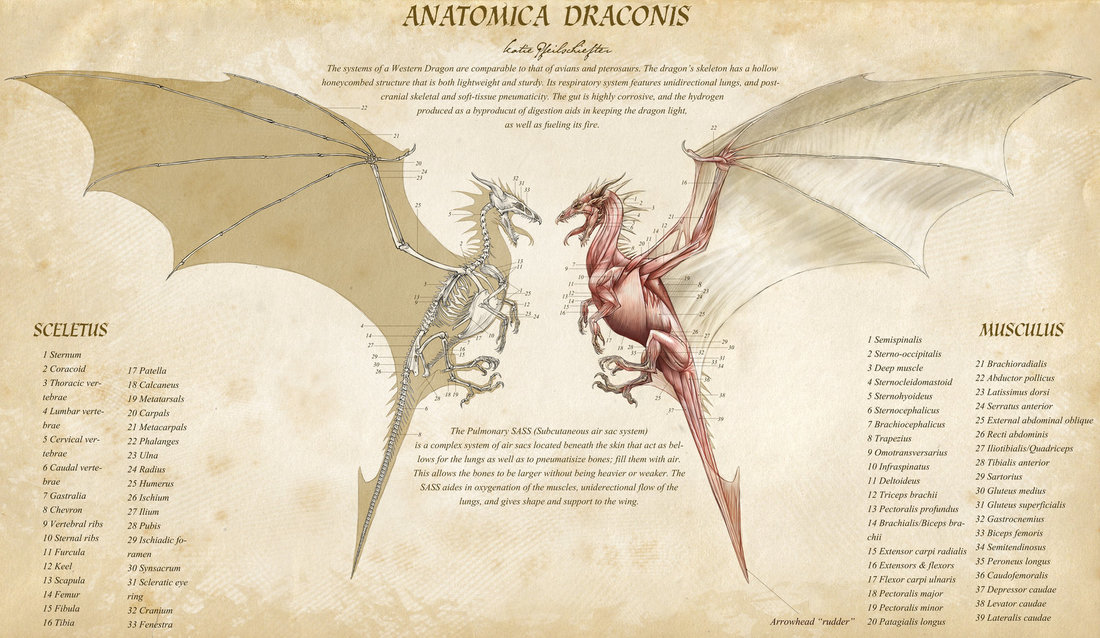
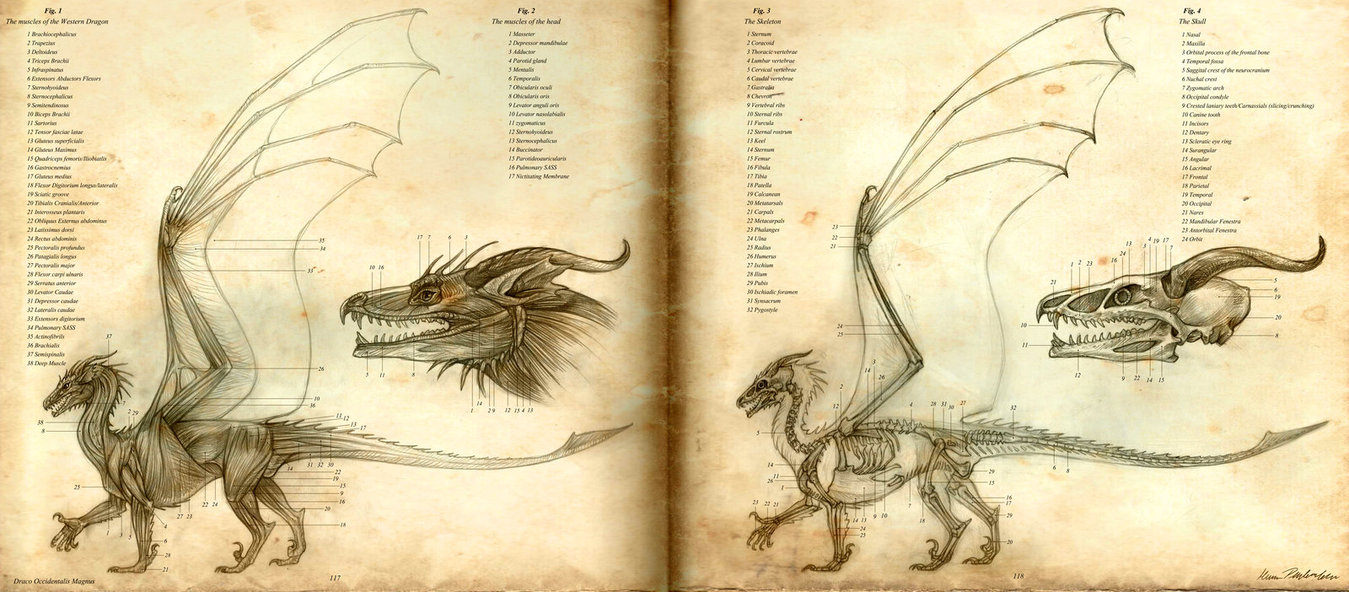
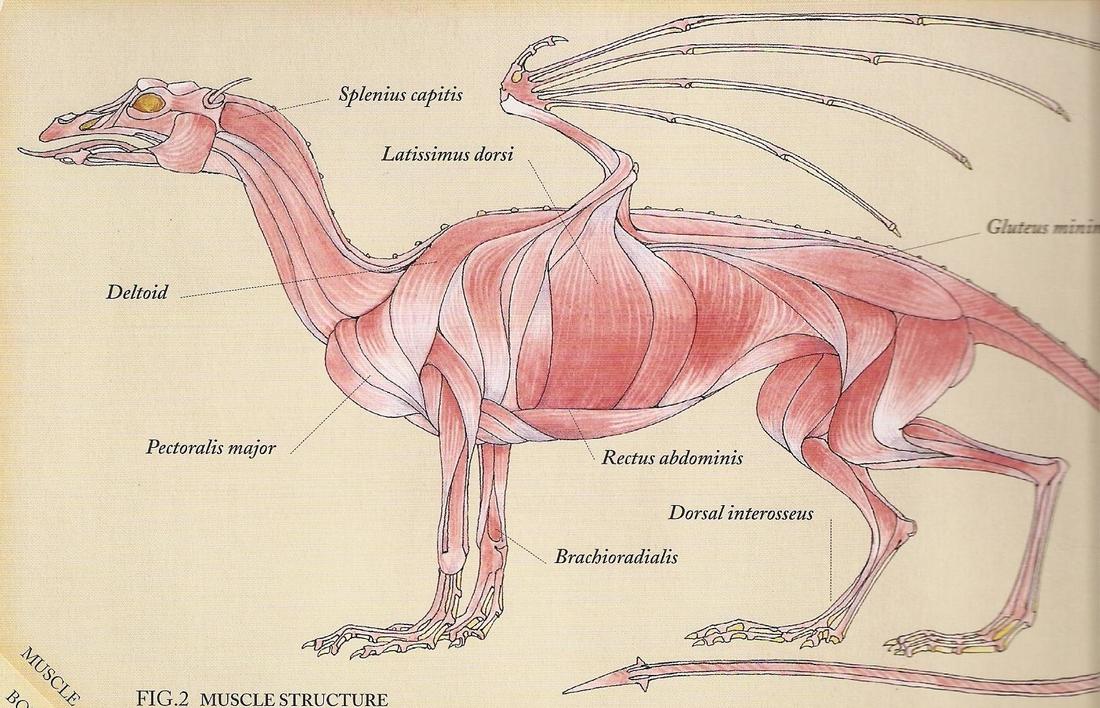
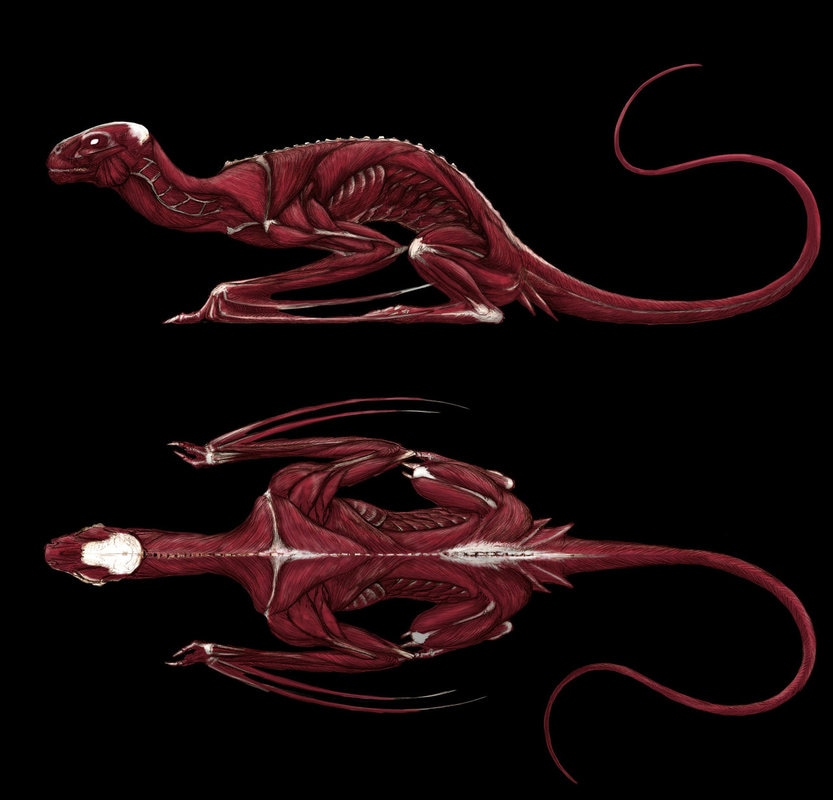
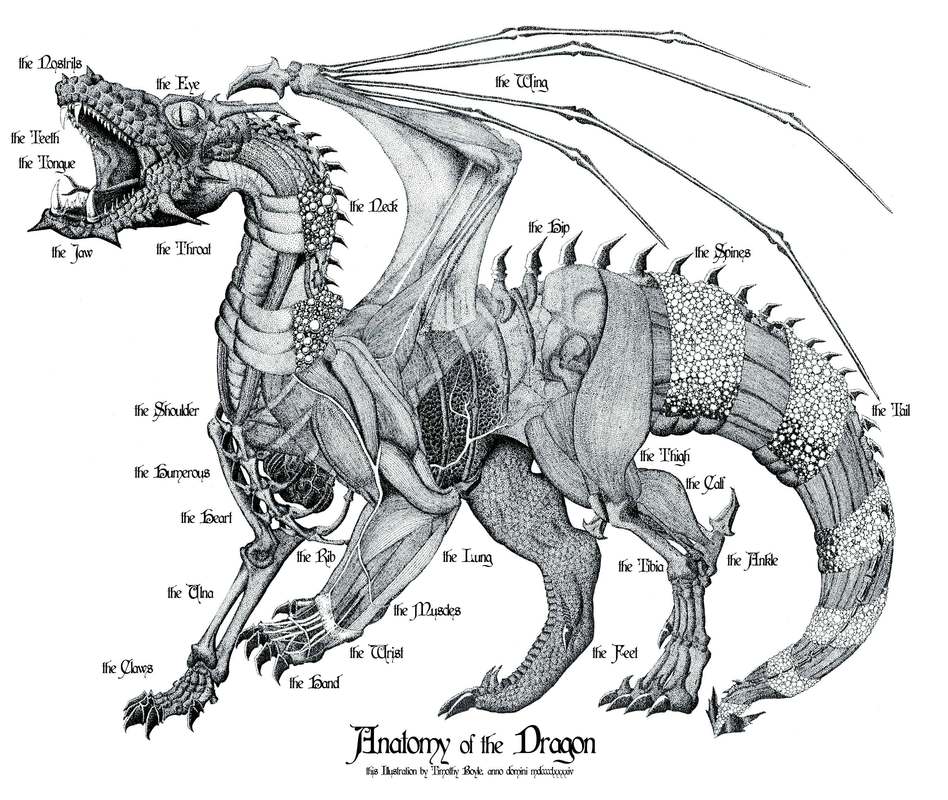
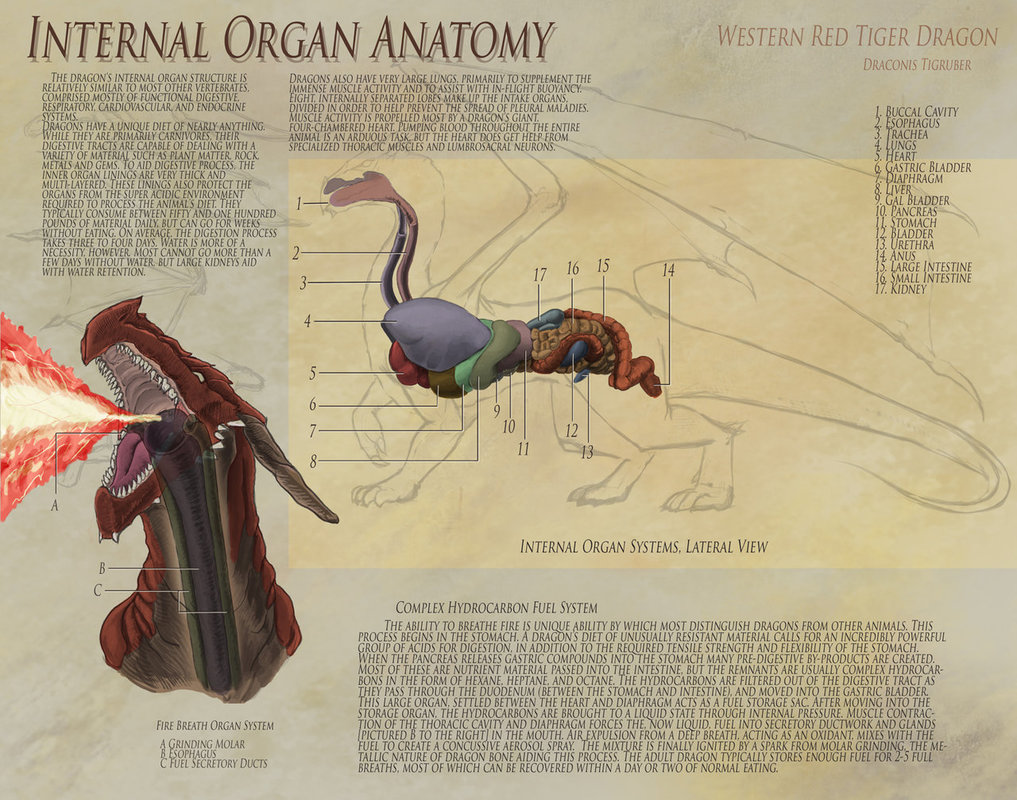
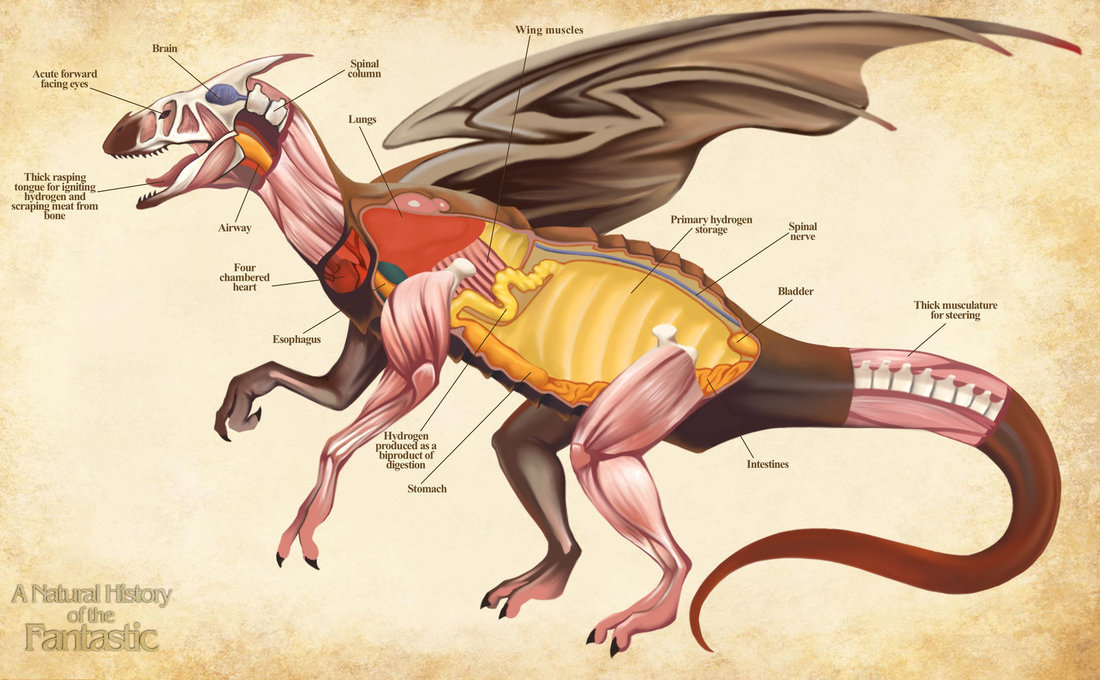
Below are some examples of dragon skeletons, muscular structures and whole bodies. I will provide hard copies of some of these for tracing and research. After you have completed the tracings, you need to start selecting what elements you want your dragon to have- you have a great deal of material to take parts from (the human skeleton, the reptilian and amphibian skeletons, bird skeletons, various mammal skeletal and muscular structures and several animal life sketches).

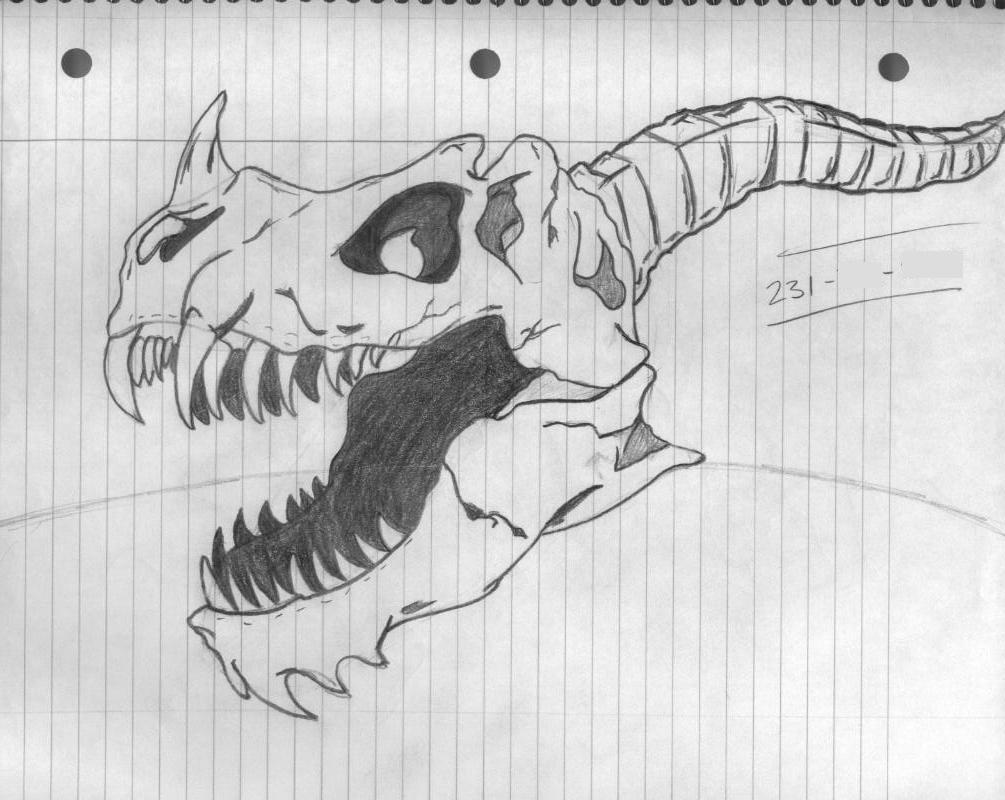
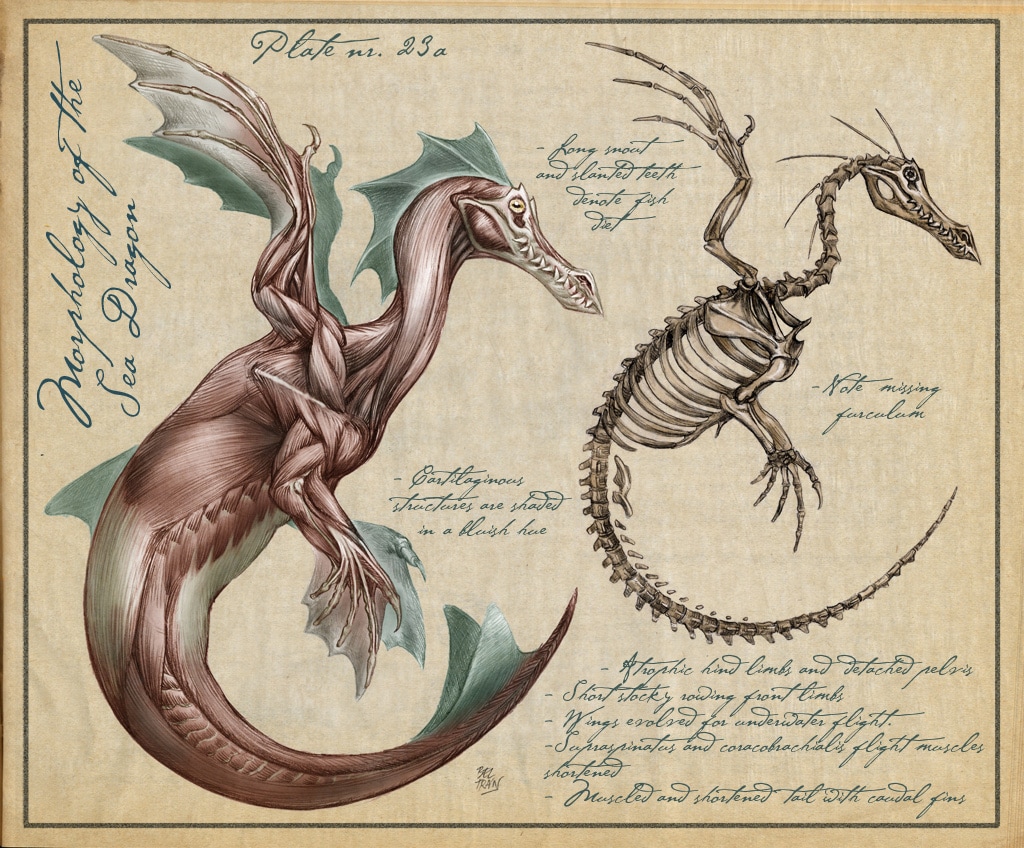


More Ideas- Materials to Help You Develop Your Dragons!
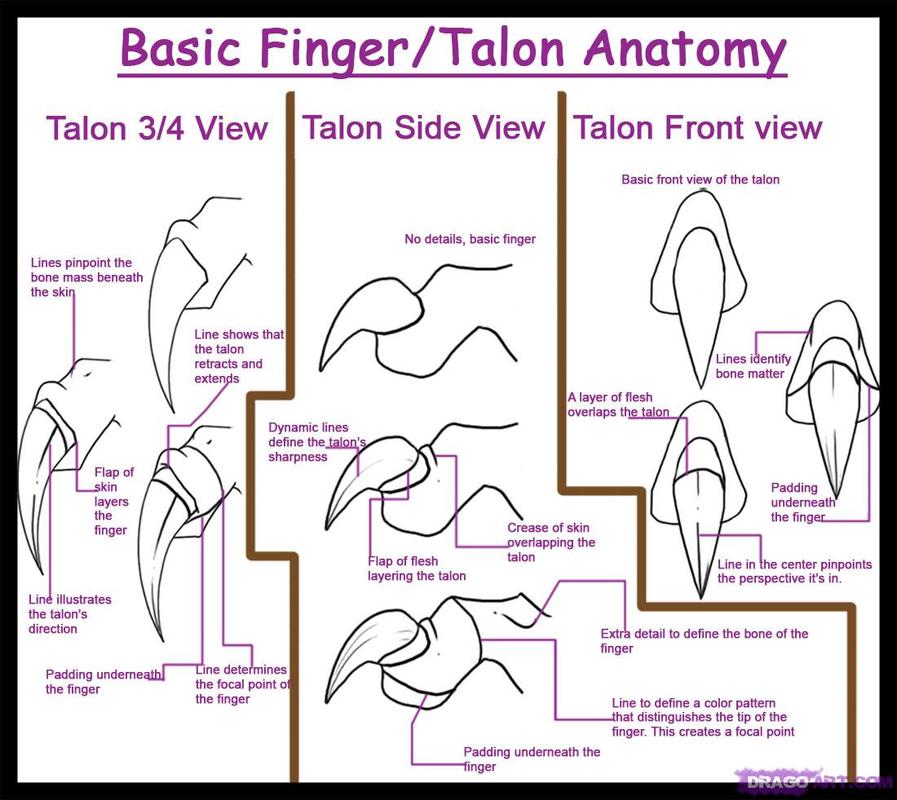
Feet and Claws
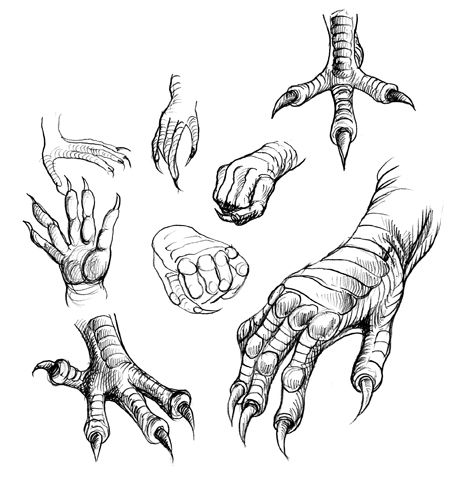
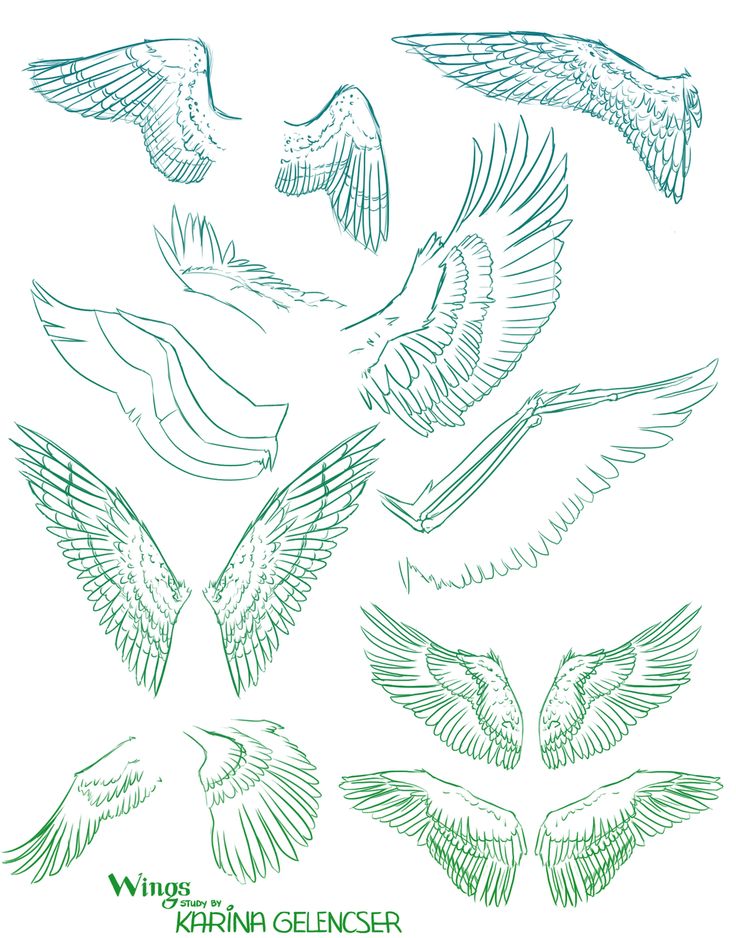
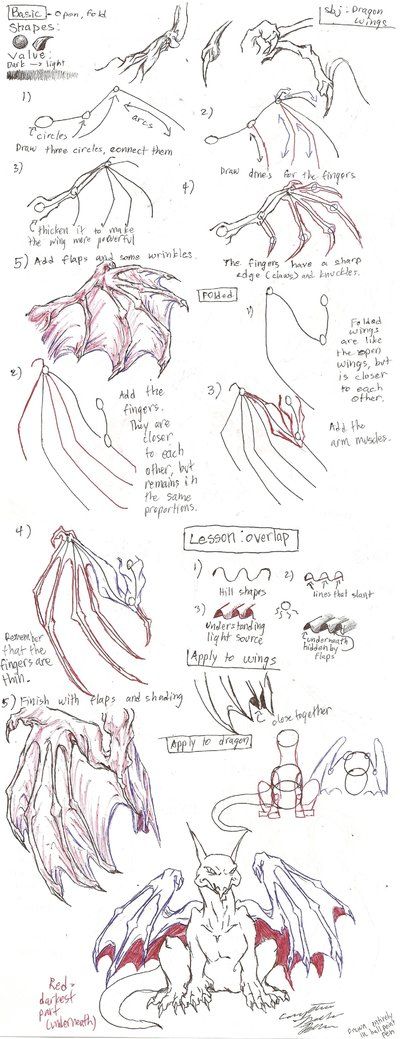
Wings
Head and neck